Please note that my station has undergone several changes since this article was written.
Having started contesting over 30 years ago at age 16, I can remember back to my youthful days in Indiana running CW Multi’s with the Indy DX’ers in the basements of Mike Koss (now W9SU) and Les Bannon (now WF5E). I remember elaborate contest station layouts and very large homebrew amplifiers with names like “Miss Mibutu” and “The Purveyor of Doom”. I always dreamed of having a station like theirs, but as a teenager, they were only dreams.
Soon after high school, life would take me to places more important than contesting. Eventually I would land in Louisiana and catch the contest bug again with those same dreams of having my own nice contest station layout.
I must have caught that bug in a big way. I evolved into an avid SO2R RTTY contester, operating in over 120 RTTY contests to date. And in the course of this evolution, instead of expanding my station layout, I kept piling equipment vertically on one main desk. This worked OK and allowed me to win several major RTTY contests, but it wasn’t very efficient. I knew all along that if something failed during a major contest, I’d be in big trouble. The desk was pushed all the way to the wall, which meant even though I had accumulated a good inventory of spares, changing anything in the heat of battle would be a major chore. The left radio’s amplifier was located so far from the main desk that I had to stand to change bands and tune it. But for many years that is how I operated, throwing caution to the wind and riding a wave of luck.
That wave would crash during the March 2004 NCJ RTTY Sprint. Due to an error on my part, while running high power, I blew the receiver protection bulb in one of my transceivers two hours into the contest. I had a spare radio sitting on the shelf, but when I realized the difficulty in changing it out; I quit the contest and shut the station down. As I sat there disgusted, mad at myself for making a careless mistake, it didn’t take any behavioral psychology to know change was absolutely necessary right away. It was time to remodel the station. And it would be built for any mode, not just RTTY.
Starting From Scratch
Without any plans, I started disconnecting equipment. In the next three days I moved everything from the shack to the dining room floor except the main, large desk. I wondered how I ever got that monster in the room to begin with.
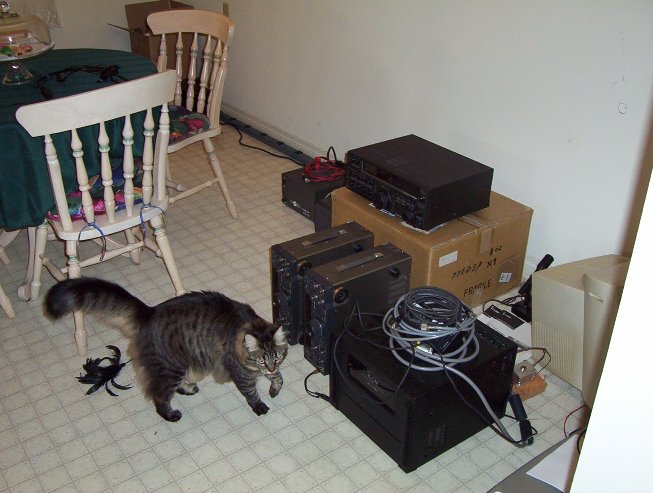 Katarina checking out the PW-1 amplifier in the dining room
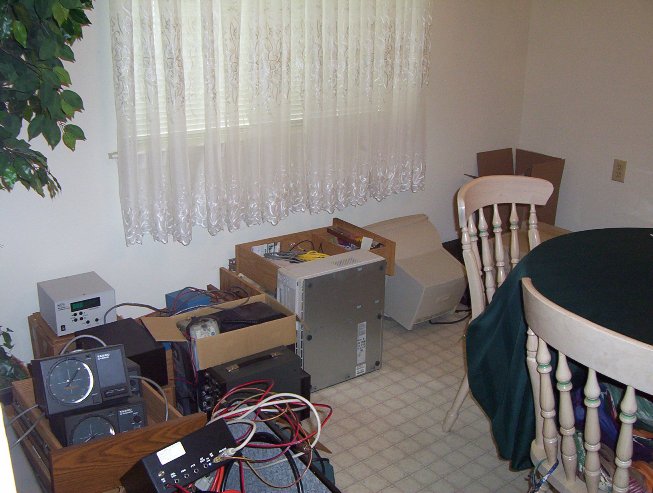 More gear in the dining room – Shay wasn’t too happy
The first thing I did after removing everything was to paint the room. I put two coats of high quality antique white paint on the walls and doors. I decided to stay with off-white in order to reflect as much light as possible in the room without being too bright. When the painting was finished, I sat at the desk in the empty room and started visualizing a general layout in my head. My vision was for a U-shaped operating position with everything within reach while sitting in the operator’s chair. I would build horizontally around me and not vertically because experience told me this would be more comfortable and efficient. And I would take whatever time needed to make it right.
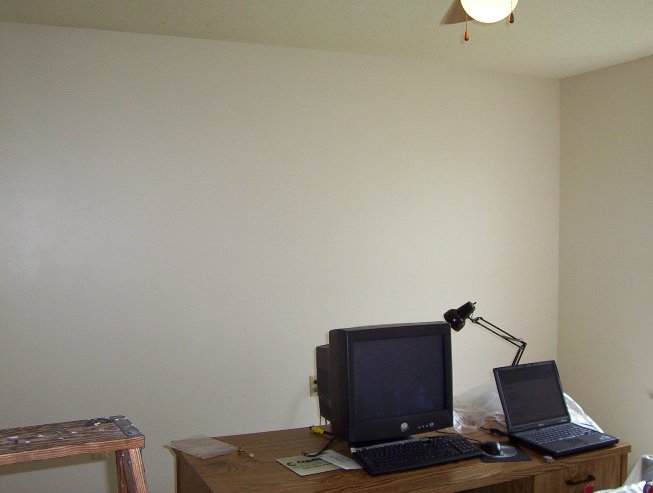 The radio room after two coats of Antique White paint
Objectives & Goals
I had two main objectives. The new station had to be comfortable and it had to be efficient. And if I was going to all the trouble of remodeling, it should at least look good too. I made a list of goals which I used to obtain my objectives:
• All equipment arranged within arm’s reach of the operator’s chair.
• Allow ease of operation regardless of mode – SSB, CW or RTTY.
• The ability to work behind the desks.
• The ability to replace any piece of equipment quickly and easily.
• New grounding system.
• New 12 VDC system allowing easy connect and disconnect.
• 240 VAC ran into the shack and distributed to all three amplifiers.
• All cabling neatly laid out and hidden.
• A position for a third radio and amplifier as an “on-line” spare.
• Room for expansion including controls for more antennas
Deciding What Goes Where
I thought about what I had to work with and what additional pieces I’d have to acquire. I had my main large desk and a smaller desk. I moved them 20” away from the walls and put them together in an L shape with the small desk to the left of the main desk. I then decided to build one shelf along the top of the desks and make space underneath for the radios and other equipment. With a jigsaw and fine-toothed blade I cut pieces from an old wall unit to make the shelf and support dividers. I measured the radios and mounted the shelf using L brackets and leftover brass wood screws from the wall unit. When finished, it came out much nicer than I had anticipated and the radios fit nicely under the shelf. It was a fun start for an experienced operator yet novice carpenter.
I now needed to think about possible locations for other equipment like rotor controls, amplifiers, band filter switches, external audio filters, TNC’s and the SixPak antenna switch. Deciding rotor controls, antenna and filter switches were items that needed to be closer to the operator; the equipment was arranged according to priority. I kept moving things around in the following weeks until I finally felt comfortable with the arrangement.
 Main desk with newly built shelf
Because I run two networked PC’s in my SO2R setup, one computer for each radio, I needed to locate the computers to allow easy access to the back of the PC’s. And the computers had to be close enough to allow short cable runs from the sound card and serial ports to radios, TNC’s and FSK/CW/PTT interfaces. To accomplish this, I removed the two drawers out of the left side of the main desk and installed one PC in the vacated space. This PC would control the left radio and on-line spare. To gain access to the back of the PC, I cut out the back of the desk with a jigsaw. I then cut off the outer faces of the two drawers I’d removed and re-installed them on hinges to hide the PC. I was tempted to do the same thing for the right-radio PC, but decided to keep at least a couple drawers in the desk. This second PC was placed under a third desk, purchased for about $40 from a local office supply store, which completed the U-shape design I had first envisioned.
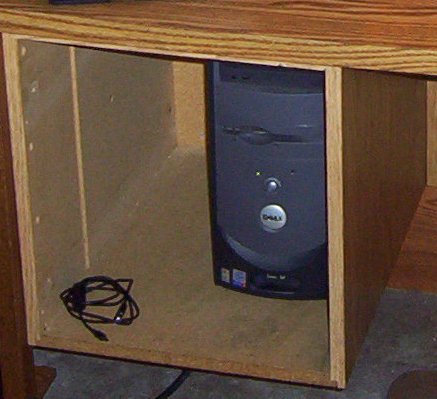 Desk drawers removed to hide the main PC
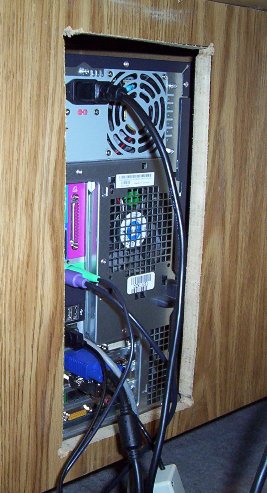 PC access from the cutout in the back of the desk
My SO2R philosophy has always been to run each station completely independent from the other. This way, if something fails with either setup, I’m not completely dead in the water. This means everything is separate. Each radio has its own networked PC, external DSP audio filter, FSK/CW/PTT interface, 12V supply and TNC (as a 2nd RTTY decoder). The only thing shared by the two radios is the SixPak antenna switch, antennas, headphone switch and ground system.
In keeping with my philosophy, everything for the left radio would go to the left and everything for the right radio would go to the right of the operating chair. When I finished with the desks and shelf, I had room on the left-hand desk for the on-line spare radio and room on the right-hand desk for future expansion.
PC Monitor Placement
In my previous SO2R setup, the radios were side-by-side in front of me and the PC monitors were all the way out to the left and right of the radios sitting down on the desk. I knew it would be more beneficial to have the monitors side-by-side directly in front of me. Since I wanted both the radios and monitors in front of me, I had to figure how to do it this way.
My first thought was to put the monitors on the shelf directly over the radios. When I did this, I realized I would have to look up to see the monitors. The idea of constantly looking up is not appealing at all to me. Perhaps having the monitors on the shelf would work for CW or SSB, but RTTY requires a great deal of concentration on the RTTY screens. Previously the monitors were on the same plane as my radios, so simple eye or head movements to the left or to the right allowed easy viewing of both radios and monitors. Looking down or straight ahead takes little or no effort. Looking upward over the course of a long contest would introduce a fatigue factor I wouldn’t accept. Since one of my objectives was comfort, I put a lot of thought into monitor placement and it became a high priority. I realized I would probably have to spend some money to get it right.
I had one 19” CRT and one 17” LCD monitor. The CRT is huge and takes up a lot of space. There was no way to lower it to a comfortable viewing height. I realized the answer was to replace the CRT with an LCD and to attach both LCD monitors to arms so I could move them to any comfortable viewing position. This way they could be placed directly in front of me during contests. Searching the Internet I found the most popular arms for LCD monitors were made by Ergotron. But at $375 apiece new from Ergotron, I was discouraged because it was more than I was willing to pay for this solution. Browsing further, I found and purchased two brand new Ergotron model 300 arms from Mendelson’s (of Dayton Hamvention fame) for $150 each.
While looking for an LCD monitor to replace the CRT, I discovered there were too many to choose from. That same day, Dell put their 20” LCD monitor on sale. It was expensive, but I had to accept that there would be cost involved because of the high importance I’d put on monitor placement. With income tax refund money in hand, I purchased the Dell.
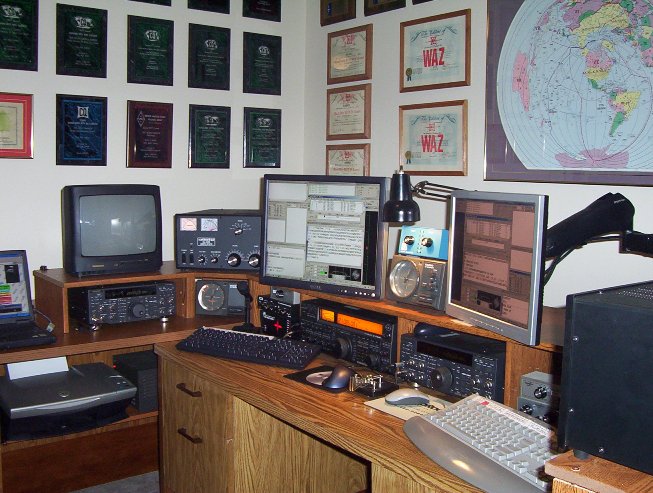
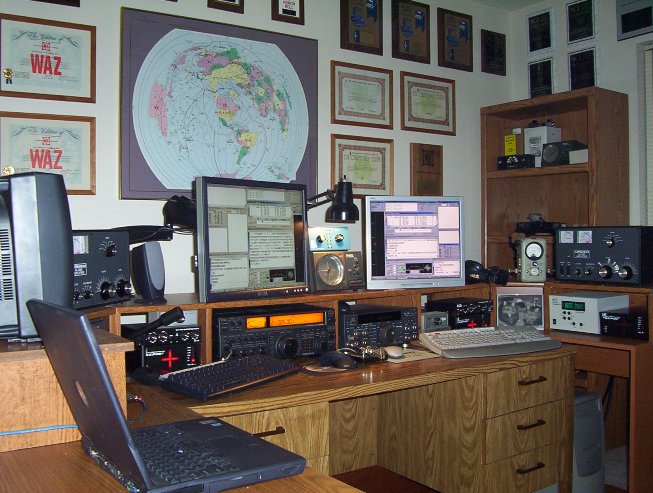
When the Dell LCD monitor and Ergotron arms arrived a few days later, I felt like I’d made a great deal. The Ergotron arms are impressive. They are extremely heavy-duty. Assembly and mounting the arms was easy. I mounted them to the back of the shelf allowing movement of the monitors to any position. Not only was this the ultimate solution, it looks really cool. Solving the monitor problem was a major relief. By the end of March, the station was starting to take on a comfortable look and feel but there was still much to do.
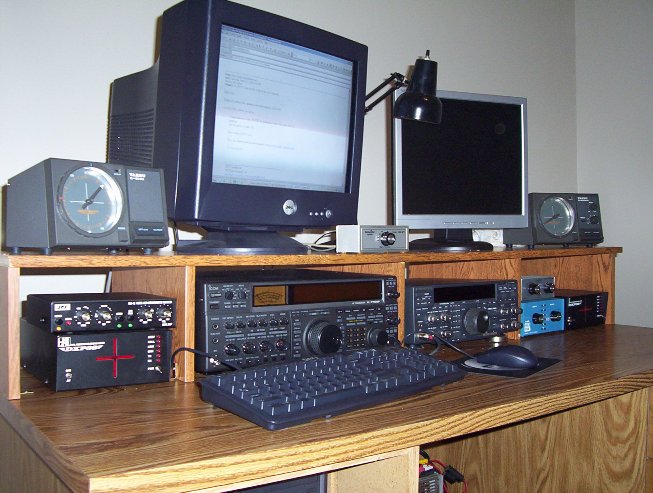
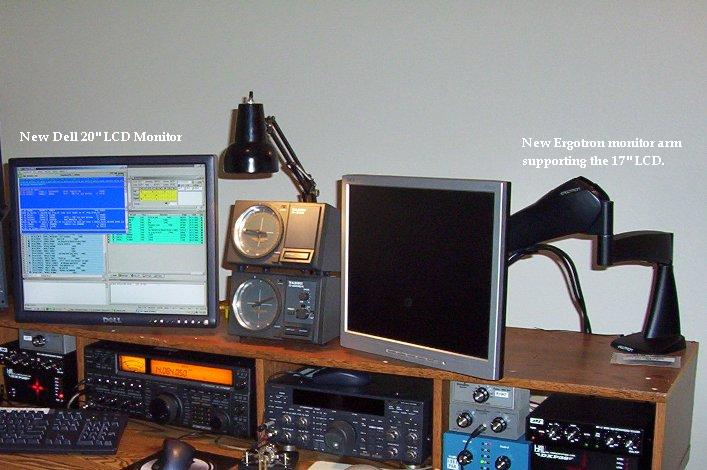 The new Dell 20″ LCD monitor & my existing NEC 17″ LCD, both supported by Ergotron monitor arms
Ground & 12 VDC System
I installed a new ground system by mounting a solid copper plate to the back of the desk and running ground wires to every piece of equipment. I then grounded the copper plate to a new 8’ ground rod outside the shack wall.
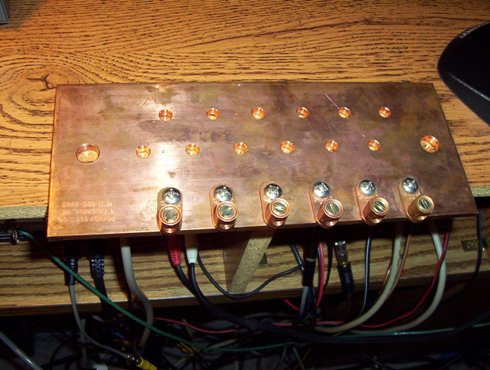 Copper plate used as a central ground location
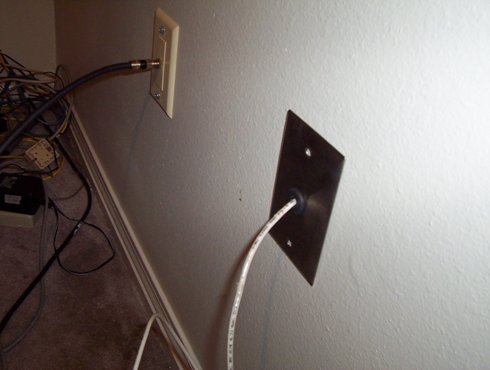
Ground wire going through the wall of the shack (cable TV cable in background)
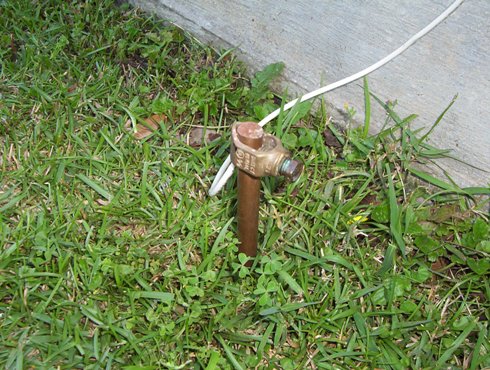
 Ground wire from the shack to the ground rod just outside the room
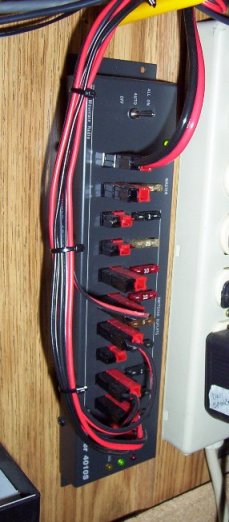
12 volt DC power distribution was solved with the addition of two 4010S RIGrunners. In keeping with my philosophy, one RIGrunner was for the left station, the other for the right station, both mounted to the back of the desk. I found the RIGrunners to be nice additions to the shack. The PowerPole connectors were easy to install. I replaced each DC cable to every piece of equipment with red/black power cable custom cut to length back to the RIGrunners.
 RIGrunner with new DC cabling
240 VAC System
I had always powered my AL-80A amplifiers on 110 VAC. However, with the addition of an Icom IC-PW1 to the station, I needed 240 VAC. Running 240V into the shack was made easy by the fact that there was a spare 240V breaker for an electric stove in the kitchen. Since my stove is gas, this breaker was unused and a stroke of luck since there was no room for additional breakers in the panel.
Running the cable through the attic was a breeze made easier when I found an existing hole in the 2×4 leading down the wall to the opening where the antenna and rotor cables enter the shack.
 Antenna, rotor control & 240 VAC (silver) cables in a bundle of the shack floor
Cleaning Up Loose Ends
One of the goals in rebuilding the station was to neaten the cabling and hide it from view when possible. I redid the cabling several times and it was the most difficult part of the job. I eventually came to realize it would never look perfect. The best I could hope for was to contain the nearly one hundred cables and wires in some sort of system of cable guides made from inexpensive utility racks mounted to the back of the desks.
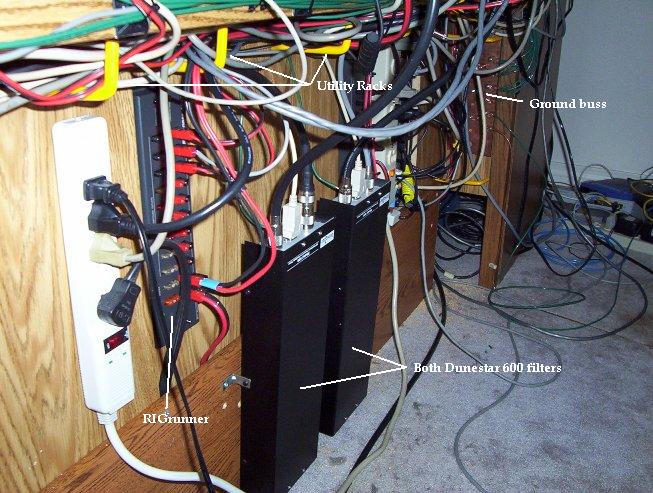 Cabling in the back of the main desk made a little neater with utility racks (in yellow)
The last part of completing the renovation was hanging the numerous plaques & certificates on the wall. I have to tell you this was not easy to do. It took several hours late one night and into the morning, but on May 22, 2004 it was finally finished.