December 16, 2012
On December 16, I completed the installation of a 3-element SteppIR yagi which is a replacement for my original 3-element SteppIR yagi that was damaged in Hurricane Isaac. I built the antenna on Saturday, December 15 and installed it the next day. It took six hours to build and another seven hours to install on the tower along with an M2 rotator, steel mast and PVRC mount.
Here’s how it went…
The tower had been rebuilt and was ready. All it need was an antenna.
The antenna arrived Wednesday, 12/12/12, but I didn’t open it until Saturday. I really like the way SteppIR packs their antennas. The weather was great for antenna building. It was partly cloudy with temps in the mid-70’s.
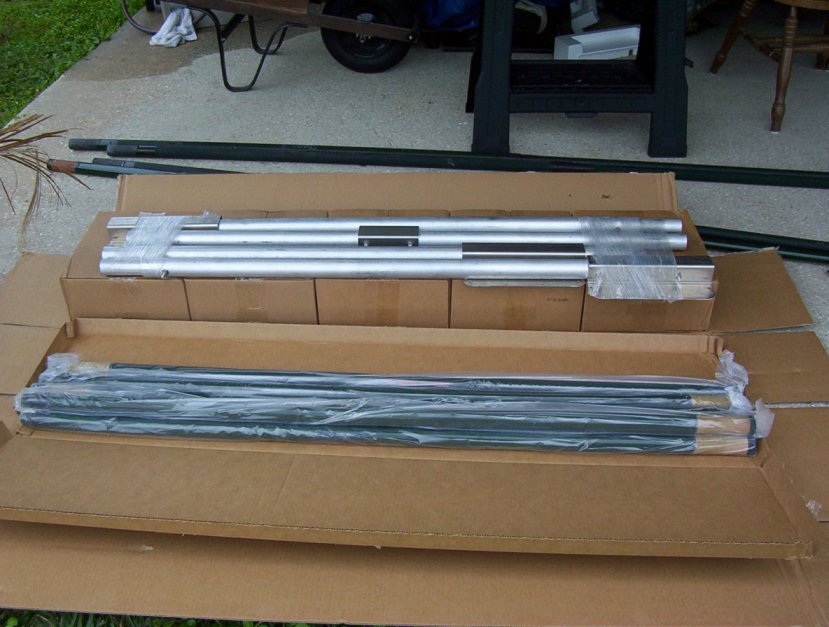
I assembled the boom on the back porch.
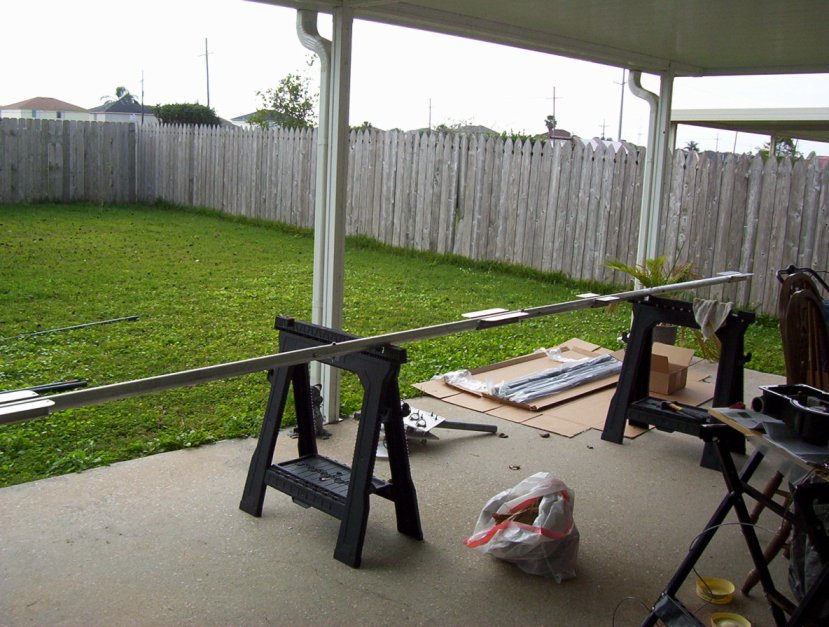
I attached the boom-to-mast plate, connector box, and EHU’s then tested the motors.

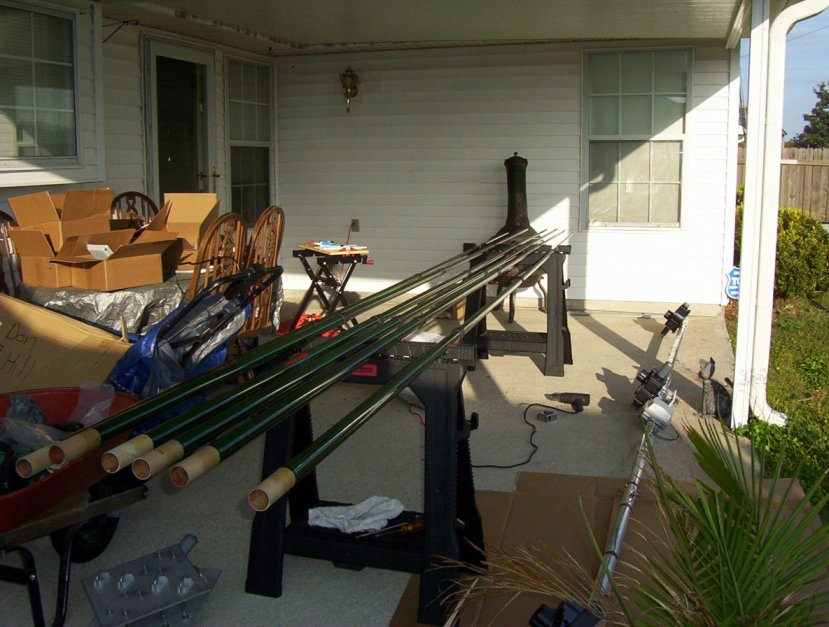
Next the six fiberglass tubes were prepared. I absolutely love the heat shrink method of waterproofing the junctions. Since I already had a heat gun, this was easy work.
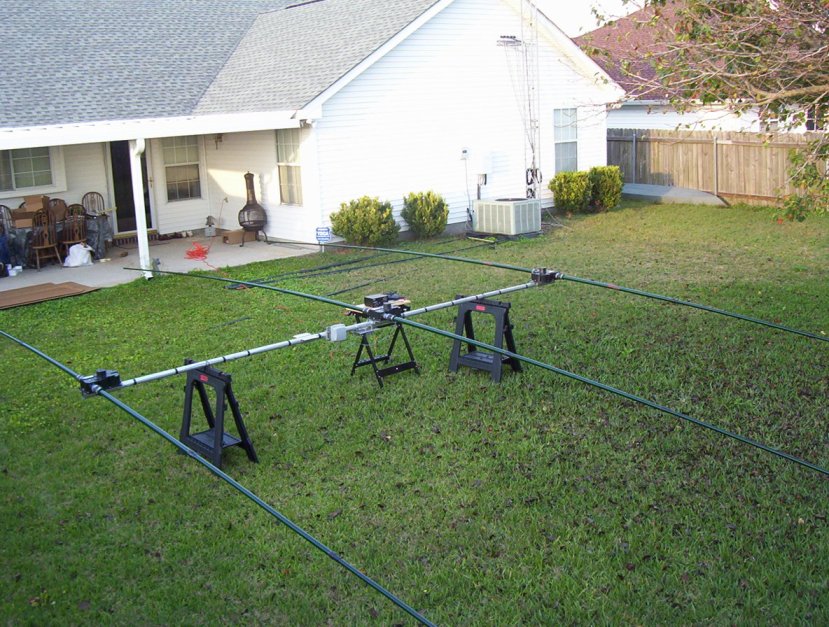
I brought the boom out to the back yard and attached the fiberglass tubes. I connected the controller and ran the antenna through different bands while putting an ear to each tube to make sure the tape was being pushed out then pulled back in.
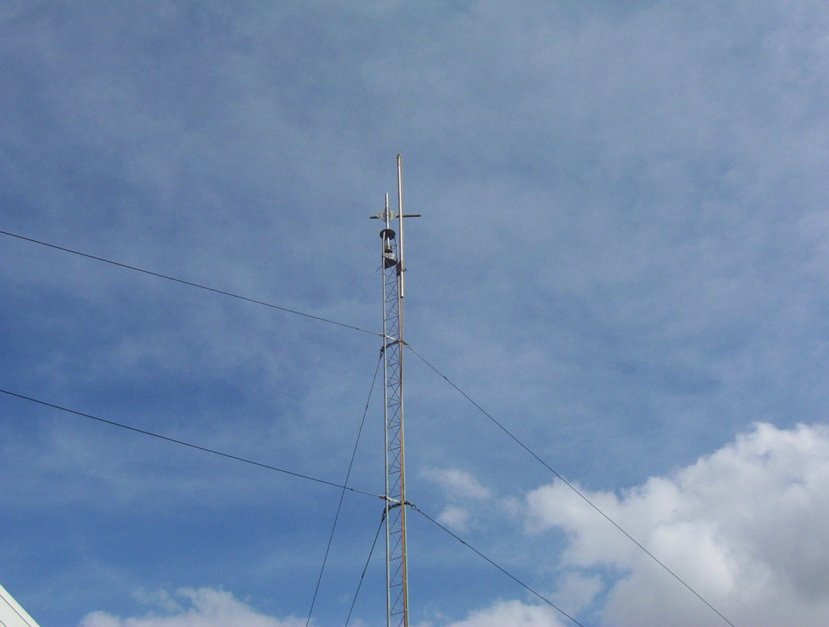
The next day I started at 9 AM local time. Since there was a lot of dew on the antenna, I decided to go ahead and get the gin pole up on the tower. I then mounted the rotor and installed the mast, including my PVRC mount. The weather was warm but the wind was picking up. There was a chance of thunderstorms in the afternoon. I needed to work steadily to get the antenna up before the rain came. I didn’t take a break all day.
On the ground, I took the fiberglass poles off the antenna and prepared the boom to be lifted. Since I didn’t know when the rain would come, I taped plastic over the EHU’s and control cable connectors. I also put the plugs back into the ends of the fiberglass tubes. Once secured, the boom was lifted to just below the horizontal mast.
The boom was then lifted by hand and installed vertically onto the horizontal mast at the boom-to-mast plate. This was not difficult because the boom was still attached to the rope coming out of the gin pole and provided stability. I only had to lift the boom a few inches and simply slide it onto the horizontal mast. I lowered the gin pole down below the top of the tower but left it up there (just in case). When using a PVRC mount, you have to make sure the boom is installed a certain way so that it rotates to its correct position after all the fiberglass tubes are installed. It will only rotate to the correct horizontal position, with the EHU’s on top of the antenna, in one direction because of the bolts that hold the boom together in the center. This takes planning when building the antenna to make sure the bolts joining the center of the boom do not interfere with this rotation when on the tower.
The antenna was now ready for the fiberglass tubes. All the while I kept watching the skies to the northwest and there was no rain in sight. Had I been pressed by oncoming weather, I would have tied all six fiberglass poles to a single rope, hauled them up and finished the antenna. Instead I just brought them up two at a time, climbing down the tower each time to take pictures and get the next two set of tubes. The wind was blowing 20 MPH with some pretty good gusts. Since I had to disconnect the top guy wire to the south, I was a little concerned, but the wind was out of the northwest and the tower was very stable so I continued.
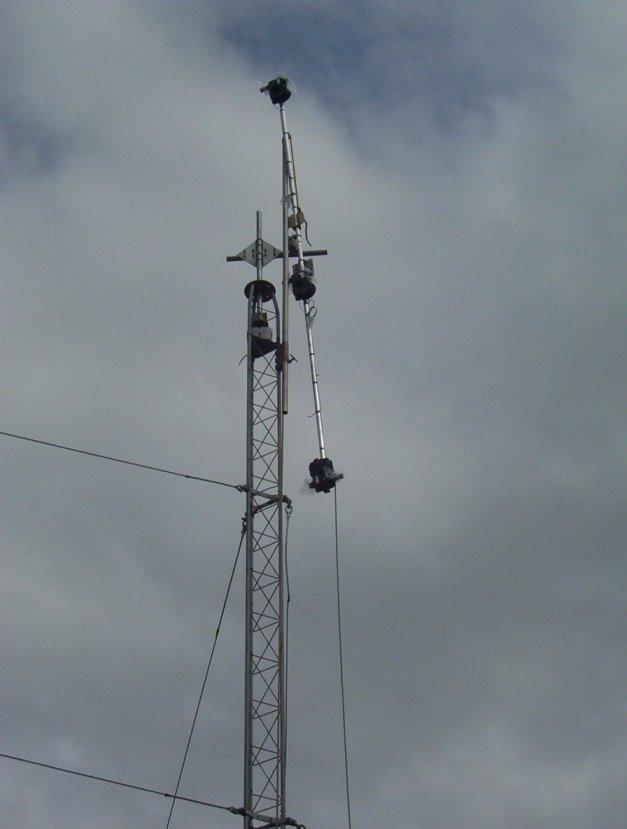
The first two fiberglass tubes installed were into the driven EHU which at the time was below the horizontal mast and just above the top of the tower. I then loosened the U-bolts holding the boom-to-mast plate to the horizontal mast and rotated the boom 180 degrees, then re-tightened the U-bolts. The tubes for the reflector were then installed while working below the top of the tower. At this point I decided the gin pole was just in the way and lowered it to the ground.
Once the fiberglass tubes for the reflector were installed, the boom was rotated 180 degrees on the horizontal mast once again so the tubes for the director could be installed (again below the top of the tower- ah, the beauty of using a PVRC mount). At this time, I took the opportunity to connect the control cable from each EHU into the connector box.

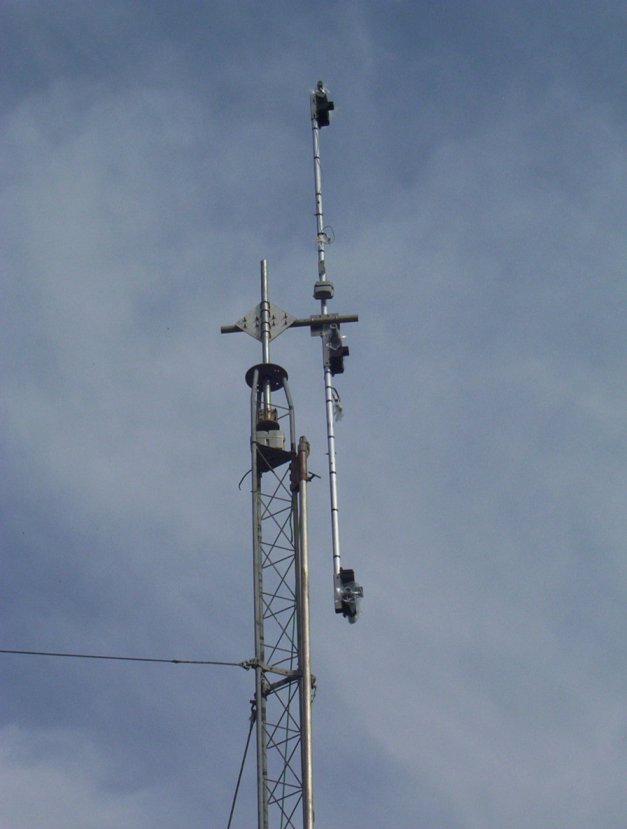
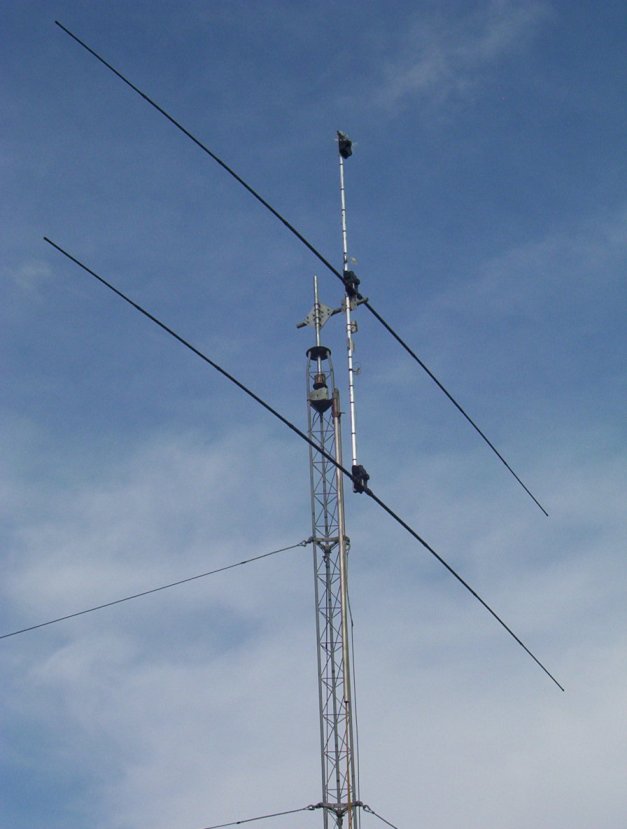
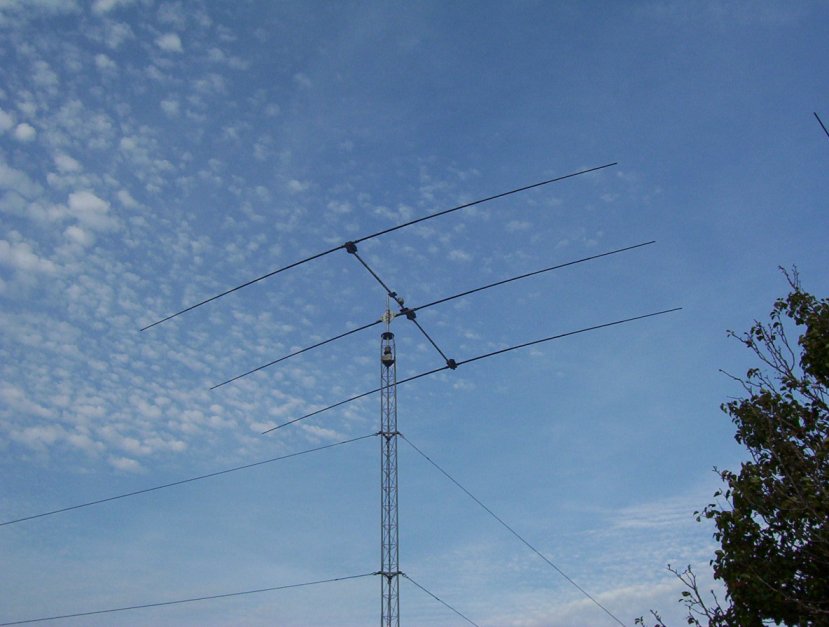
Once all six tubes were installed, the boom was rotated again on the horizontal mast again, but this time only 90 degrees so the boom was in its correct horizontal position. I used a small level to get the boom as close to being horizontal as I could. This was not easy to do with the wind but I managed to get it pretty close.
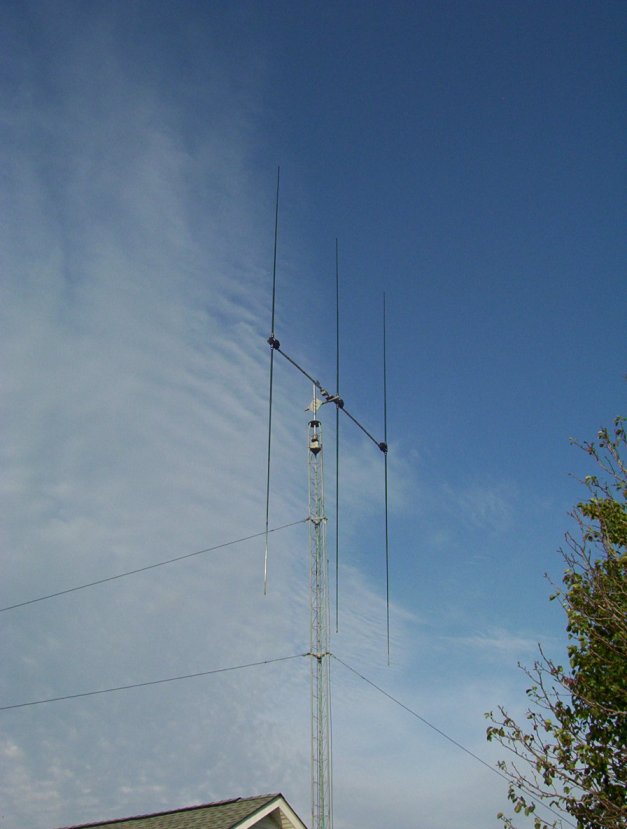
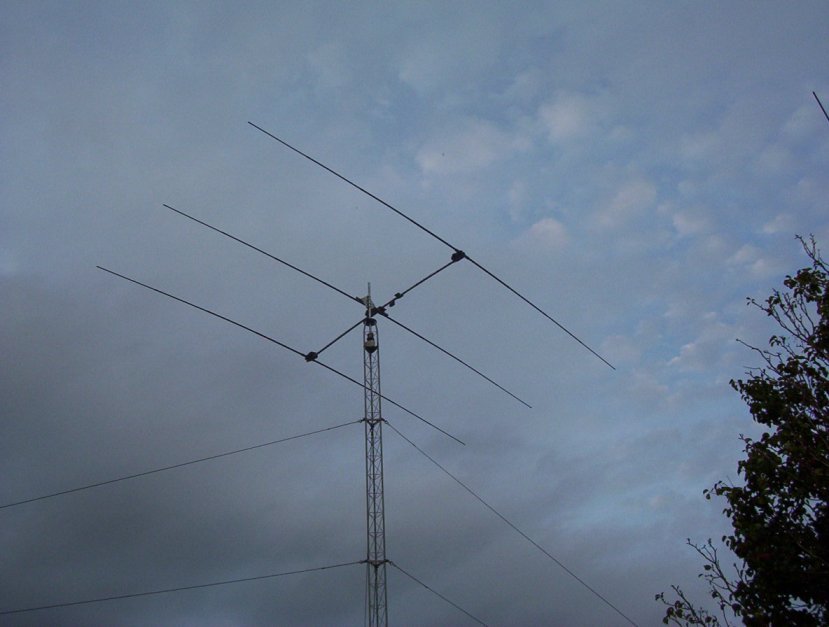
To get the antenna to its final resting position, I loosened the U-bolts holding the boom to boom-to-mast plate and rotated the antenna 90 degrees. I used a level against the bottom of the EHU bracket to get the elements as close to horizontal as possible. I then tightened the U-bolts holding the boom to the boom-to-mast plate. Once off the tower, I reconnected the south guy line. Good thing because the skies to the northwest were growing darker by the minute.
I wasn’t finished yet. I climbed up one more time to point the antenna to the north where the rotator was set to. Thirty minutes later, it started to rain. It was 4 PM. I didn’t get to test the antenna because I didn’t have time to install the coax, rotor control cable or the SteppIR control cable. Expecting good weather next weekend. Can’t wait!
73, Don AA5AU