After removing the fiberglass poles from my 3-element SteppIR yagi antenna in preparation for the possible arrival of Hurricane Nate in October 2017, I decided to paint them. The antenna was installed in December 2012 and had been up for nearly 5 years.
The first thing I did, and I highly recommend this, was to watch the YouTube video by Max George, NG7M, on painting SteppIR antenna poles. You can find the video here. Like Max, I used Rust-Oleum Marine Coatings Deep Green Enamel Topside Paint because it was readily available at the local Lowe’s store.
Work Location & Setup
Work location is very important. I would recommend either a well-ventilated indoor location or somewhere outside with a cover.
The paint has a strong odor to it and although it’s not toxic, if you are working indoors, it may linger for several days. If you work outside, having a covered area keeps rain or dew from getting on the poles as the paint is drying. The dry time between coats for this paint is 24 hours. I used a covered patio area and it worked well.
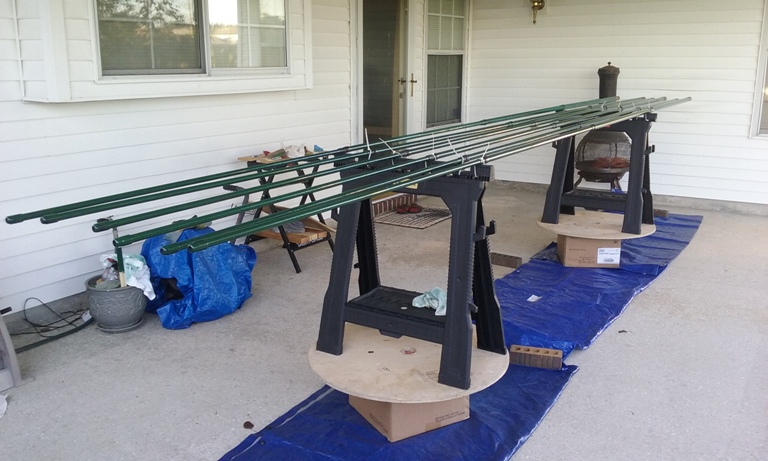
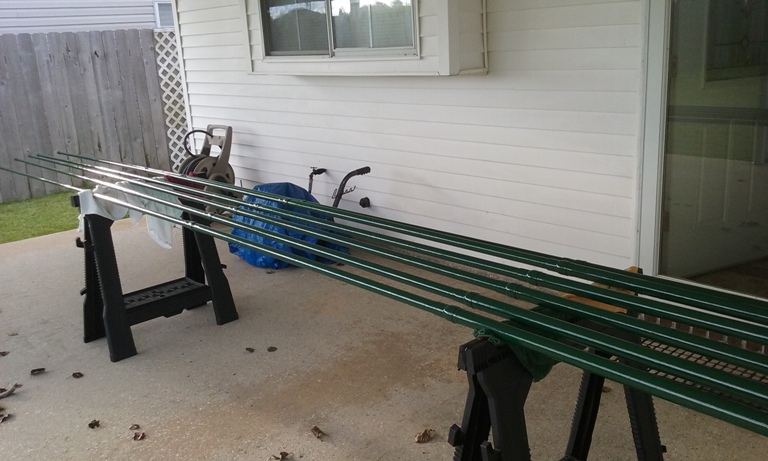
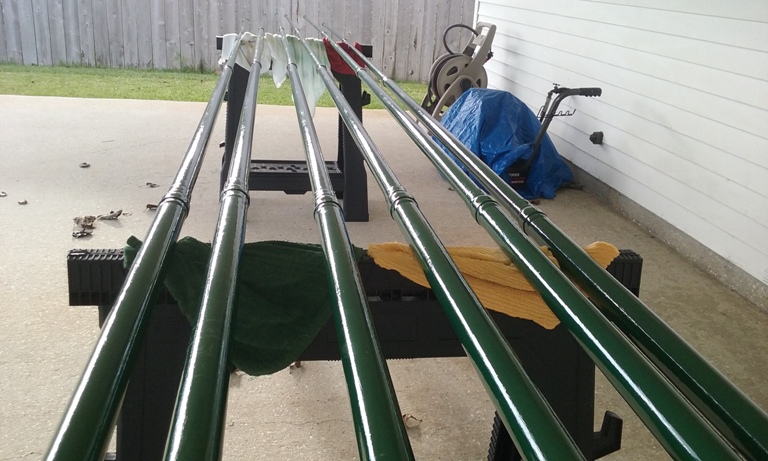
Like Max, I used saw horses as a work platform. One issue I had was that the horses were too low and after a couple hours stooping over the poles, my back got sore. My recommendation is to raise the saw horses, or whatever work platform you use, high enough to make it comfortable to work on the poles. I did just that before prepping the poles for a second coat of paint as you can see in Photo 1 and it worked much better for me.
Photo 1 – Elevating the work platform makes sanding and painting easier.
Sanding the Poles
I sanded the poles with 150 grit sandpaper. I also sanded the heat shrink tubing at the joints since I planned on painting them too.
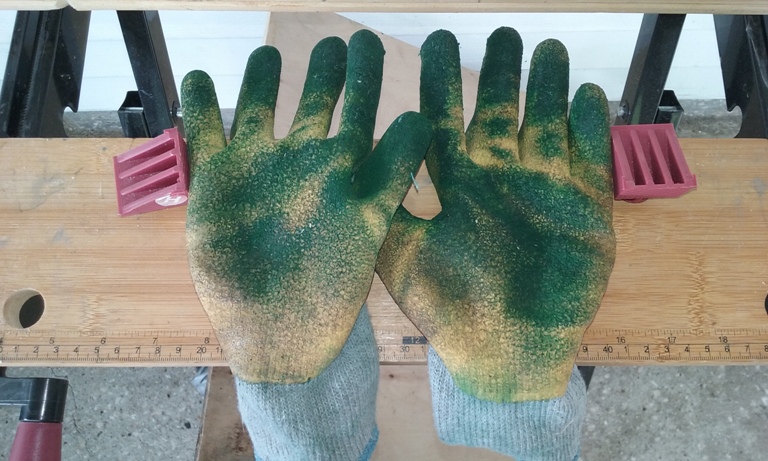
Luckily there were only a couple of places where the fiberglass was showing after sanding as shown in the Photo 2. I wore gloves while sanding and the gloves turned green from the residue as shown in Photo 3. So gloves are a must for sanding. Since I wasn’t going to immediately paint after sanding, I used a garden hose and sprayed water to remove the dust residue; making sure not to get any water inside the poles. That worked well. Saturday I would paint the poles. Before painting, I read the instructions on the paint label. The product label can be found here.
Photo 2 – Fiberglass showing through the old paint after sandingPhoto 3 – Gloves caked with paint residue after sanding poles
Removing Excess Glue from the Heat Shrink
If your SteppIR antenna uses heat shrink tubing at the joints of the poles, then you may want to consider removing the excess glue that seeps out from under the heat shrink during installation.
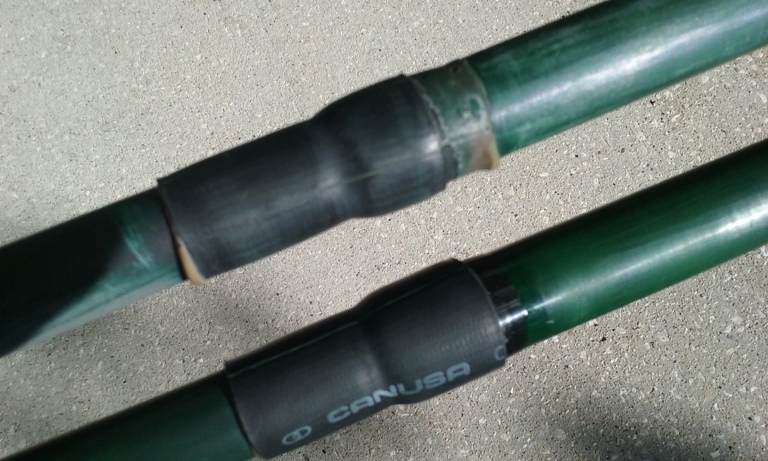
When I inspected my poles, the glue was hardened and I initially planned to just paint over it. But when I cleaned the poles with mineral spirits before painting, I discovered that the mineral spirits softened the glue. I decided to remove the glue completely from the poles. I don’t know that it’s important to remove the glue, but I didn’t want to take a chance of the glue ruining the paint job. I see that Max didn’t remove the glue from his poles so maybe it’s not important. Removing the glue proved to be a challenge and added an extra hour or more to the job.
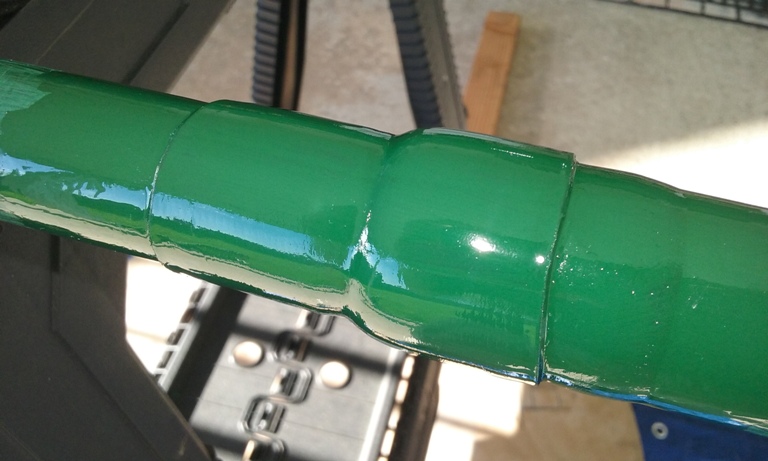
To remove the glue, I first softened it as much as I could with a rag soaked in mineral spirits. I was also wearing a pair of heavy duty leather work gloves and the gloves were soaked in mineral spirits too. Using the gloves to work the mineral spirits into the glue helped make the job a little easier. In places where the glue was thick, I used a small pocket knife to scrape off the excess glue. I found it best to keep the knife blade at a 90 degree angle (perpendicular) to the tube when scraping. This helped to keep the blade from chipping the old paint or damaging the pole. Photo 4 shows what it looks like before and after removing the glue.
Photo 4 -Before and after removing heat shrink tubing glue at the joints.
Rotating the Poles while Sanding and Painting
When I sanded the poles, I rotated them on the saw horses and it worked well. Max rotated his poles while he painted, but I found it difficult to keep the heat shrinked joints on the saw horses when the poles were rotated and it may have been because I was working too fast. The poles wanted to slide. This is not important when sanding, but very important when painting because you don’t want the freshly painted surface of the poles to accidentally touch the saw horses and mess up the paint.
I decided to loosely attach the poles to the horses using cable ties at the joints, but the poles still wanted to slide. I then tightened the cable ties so the poles wouldn’t move and this is how I painted them. As it turned out, I don’t think it was a great idea because I missed a couple areas I couldn’t see on the bottom side of the poles. I was later able to paint those areas I missed when I painted the heat shrink so it wasn’t a big deal. As I found out on the second coat, rotating the poles as you paint is much better.
If you want to be able to paint the entire length of the poles at once while on the saw horses, you either have to tie them down at the joints like I did for my first coat or be very meticulous and work slower like Max did and maybe you won’t need a second coat. There is another solution which I used for my second coat. If you paint the poles by sections, you can paint two sections one day and the other two sections on another day and this way you can allow the poles to slide while rotating without messing up the paint job. This worked well for my second coat.
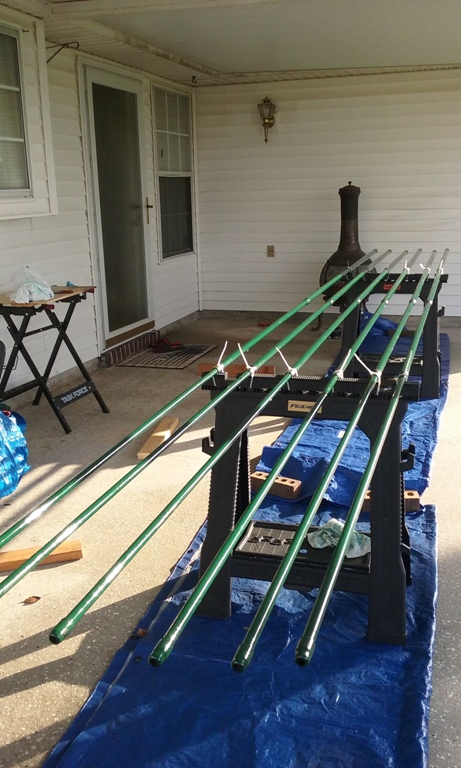
Photo 5 – Painted poles secured by cable ties.
First Coat of Paint
I used a good quality 2″ bristle paint brush to paint the first coat. The brush was designed for oil based paint and I wore powder free non-latex gloves. It took me nearly three hours to paint six poles. I wasn’t happy with the result.
I tried to be liberal with the paint because I learned from Max’s video that you don’t use a lot of paint on this job. After I painted a section of a pole, I immediately went back over it with more paint. This paint begins to dry quickly so once you finish a pole, that’s it. Don’t touch it again with a brush until after it’s completely dry.
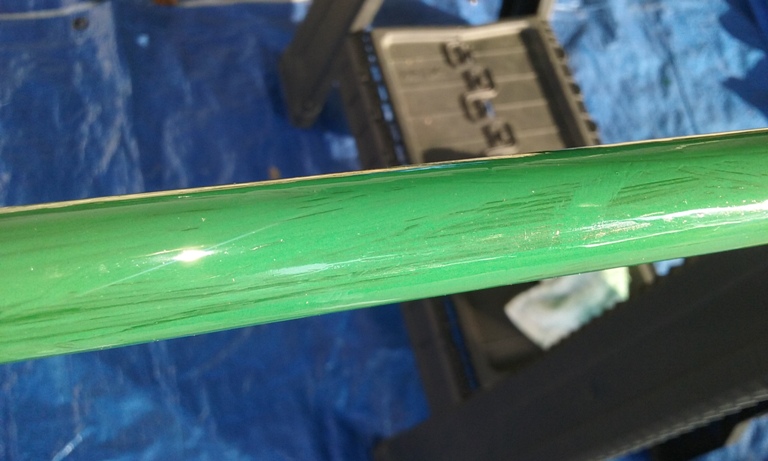
Despite being under a cover, the sun was so bright the day I painted the first coat that it made it difficult to see what I was doing with the paint because I was working in the shade. After it dried, I saw lots of places that showed streaks in the paint as shown in Photo 6. Max was able to use only one coat, but I immediately decided my poles needed a second coat and wondered if I should have used a foam brush instead of a bristle brush. Or maybe the bristle brush I used was not of the quality that it should have been. Maybe I was just in too much of a hurry or it was too dark. Or maybe it was all the of above.
Photo 6 – Brush streaks in the paint after first coat.
Painting the Heat Shrink Tubing
Three days after putting the first coat of paint on the poles, I painted the heat shrink tubing where the poles were originally cable-tied to the saw horses.
Before painting the heat shrink, I sanded the entire length of the poles with 220 grit sandpaper in preparation for a second coat of paint. I then cleaned the poles by lightly wiping them down with mineral spirits. This is when I noticed there were a couple of areas on the poles that I missed when applying the first coat.
Since I didn’t like the way the bristle brush applied the paint for the first coat, I decided to use a 47 cent 1″ foam brush from Walmart to paint the heat shrink tubing just to see how it worked. It worked better than expected and the results were excellent as shown in Photo 7. This was only one coat and it came out great. What’s really nice about using a foam brush is that you just throw it away when finished.
Photo 7 – Heat shrink tubing painted with an inexpensive 1″ foam brush from Walmart with excellent results
Second Coat of Paint
The next evening (Wednesday), I started putting a second coat on the poles. I was so happy with the results using the foam brush on the heat shrink tubing that I decided to use foam brushes on the 2nd coat as well.
Since I had originally purchased two 1″ and two 2″ foam brushes to try, I decided to use one of the 2″ brushes. It worked well but I prefer the 1″ brush. The 2″ brush seemed too big. Since I wanted to rotate the poles as I painted them, I painted only the 1st and 3rd sections of each pole that evening. The 2nd and 4th sections rested on the saw horses when the poles were rotated. This worked great for me because I was in a bit of a hurry to finish before being eaten alive by vicious Louisiana mosquitoes. It took a little more than an hour and a half to put the 2nd coat on two sections of the six poles. I started about 5:30 PM and it was dark when I finished. The mosquitoes were out in force.
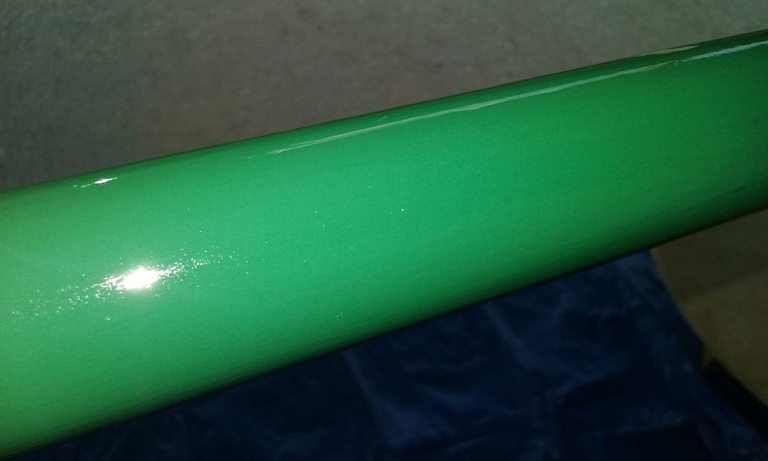
I have spotlights on the back porch but what I found very helpful was wearing a hat that had LED lights built in. (A head lamp would work well too.) I was able to direct the light at the area being painted and did not miss any spots like I did on the first coat. The next morning, I was very happy with the results. As you can see in Photo 8 below, the paint was evenly distributed on the pole and the poles looked great.
Photo 8 – 2nd coat of paint on the fiberglass poles using a foam brush came out very well
The following Saturday (October 21st), I was able to put the second coat on the 2nd and 4th section of each pole along with all the heat shrink tubing. On Sunday, the poles looked perfect to me. The painting was over. I used less than a half quart of paint. On the windless morning of Saturday November 4th, I re-installed the poles onto the antenna and all is working fine.
Photo 9Photo 10
In the spring of the next year (2018), I converted my 2-element SteppIR back to 3 elements and painted the fiberglass poles on that antenna. That page is here.