I took my Cushcraft D40 rotatable dipole down for Hurricane Zeta. It resided on the lower tower just under a 3-element SteppIR yagi. Because it was so close to the SteppIR, it de-tuned the yagi on 10 and 15 meters. With no easy way to separate the two antennas at the time, I decided to leave it since 10 and 15 meters were not open. Well, guess what? The bands have come alive as we go into the new sunspot cycle!
During the storm the antenna was damaged while on the ground when hurricane-force winds picked up my pirogue (flat bottom canoe used for duck hunting) and threw it on top of the D40. One of the rods to X-hat (capacitance hat) broke. One of the rods on the other end had already broken years ago so I didn’t think it would make much difference but it did.
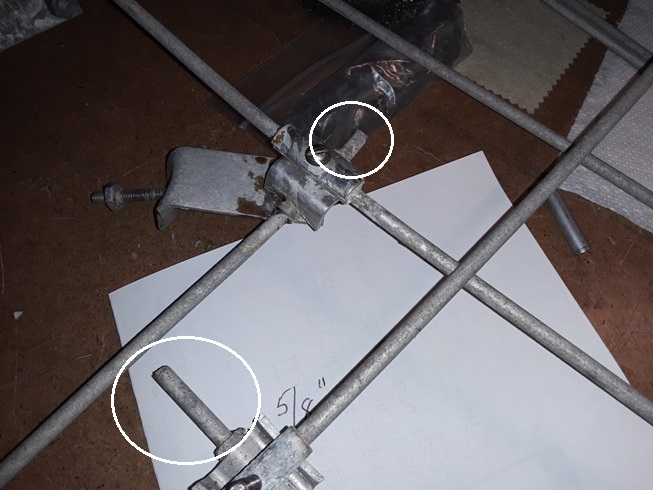 Rods broken on each X-hat for the Cushcraft D40
When the antenna was put back in service in 2018 after being down for 8 years after a direct lightning strike, I tuned it to 7075 kHz. After the storm, the resonance was found to be 7175 kHz after it was reinstalled on the tower. Apparently the broken X-hat rod, or something else, changed the resonance 100 kHz and made the antenna look shorter. I decided to take it down, make a new pigtail for the feed point and repair or replace the broken X-hat rods.
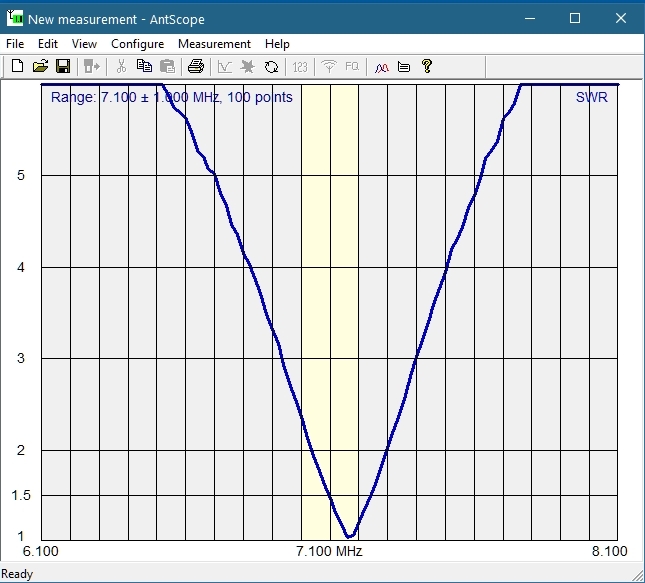 D40 resonant at 7175 instead of 7075 kHz after being reinstalled post-hurricane
In a junk drawer I found a two metal couplers to join the rods together. They were the perfect size. I needed two replacement rods. I found an old home-brew 2-meter yagi in my antenna junk pile that had the exact rod size diameter I needed. I cut two pieces 17″ long (the rods are 16 5/8″ from the end of the center coupler to the end of the rod – there are 4 rods to each X-hat assembly).
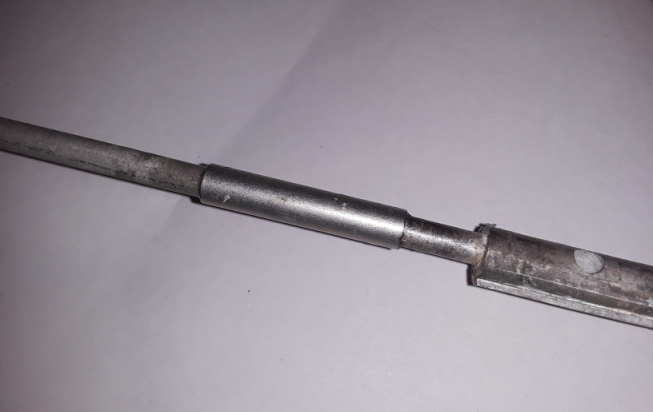 Metal coupler used to repair broken X-hat rods
Even though the rods fit snug into the newfound couplers, I feared they would fall out over time. Also, I didn’t know what kind of metal the couplers were made of. They weren’t aluminum because they stuck to a magnet. To keep the rods from falling out and to protect them from rust and corrosion, I covered both couplers entirely with JB Weld epoxy.
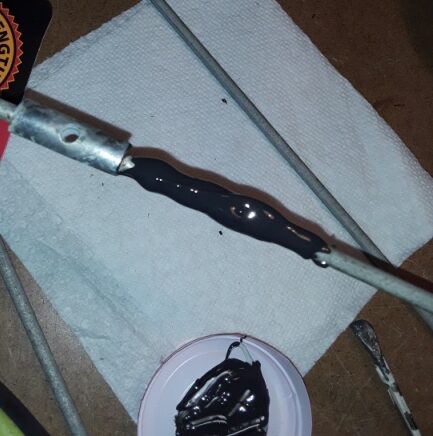 Used JB weld to secure and protect the coupler
The next morning after the JB Weld cured, I cleaned all the pieces of the X-hat and reassembled them. I cut the newly installed rods to the correct length to match the others and remounted the assemblies back onto the antenna. I then covered the JB Weld with two coats of liquid tape for protection from the sun.
 Repaired X-hat assemblies reinstalled back onto the antenna
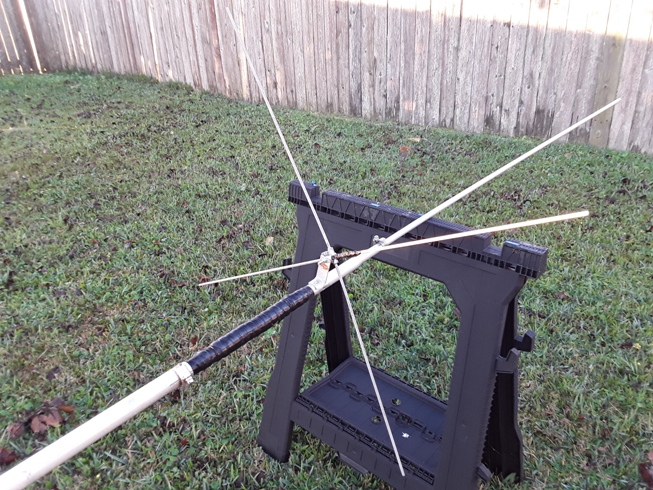
On Saturday, December 5, 2020, I tested the antenna by temporarily installation it back on the tower just under the SteppIR. Before raising it, I set all the length measurements according to the original installation instructions. To my surprise the antenna was nine inches short on each end. The very end pieces were missing but that’s the way the antenna was when I took it down. So I had to add more tubing to each end.
The first time I raised the antenna, resonant point was at 6.760 MHz with the default lengths according to the installation instructions. This was not good.
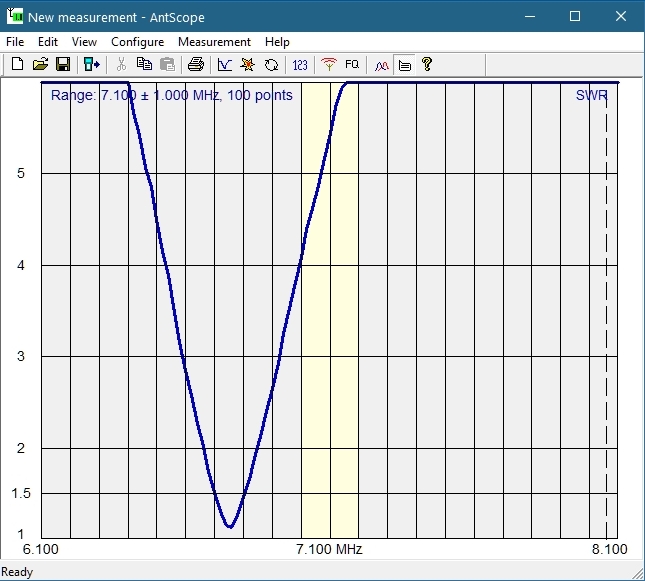 Point of resonance was 6760 kHz with default lengths per installation instructions
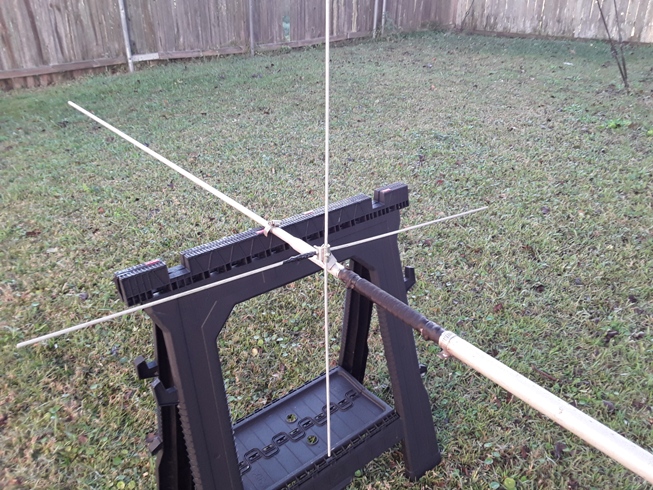
I removed the 9 inches of tubing added earlier. On the second lift the antenna resonance was just under 7.000 MHz so I was getting close. I then shortened each end by 1.5″ by sliding the tubing in. On the 3rd try the resonance was perfect at 7.070 MHz. That’s where I wanted it.
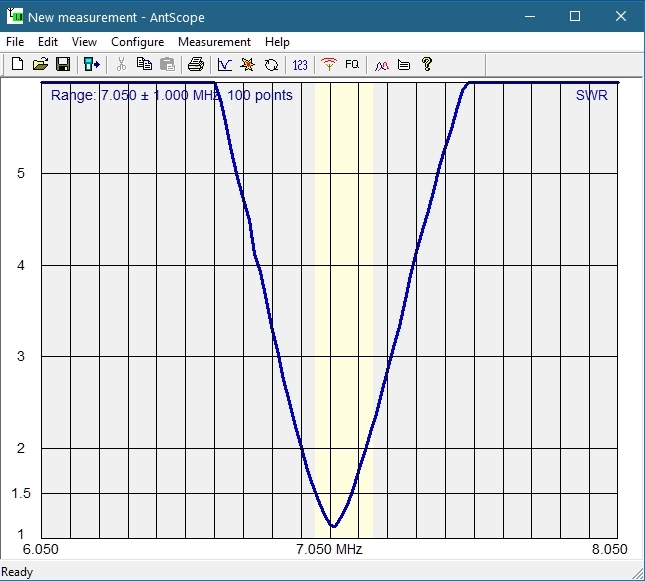 The antenna is resonance at 7.070 MHz
I then mounted it five feet above the SteppIR. It is a thing of beauty and it works great! I took SWR graphs of the SteppIR on 10 and 15 meters and there was very little change meaning there is very little interaction between the 2 antennas now.
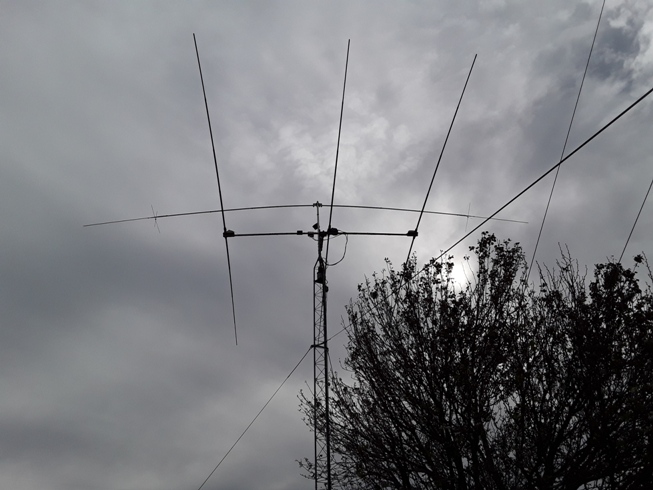 Cushcraft D40 five feet above a 3-element SteppIR yagi