I rebuilt this EHU first since it had the most problems. One of the tapes in the driven element housing unit (DVR EHU) had jumped the sprocket which prompted the antenna to fail when it was 2 elements. The EHU also had a good sized hole in the top of the housing, which was created by a woodpecker. The woodpecker was later discovered pecking the fence a few feet away from the tower.
Video 1
On first inspection, the EHU looked OK other than minor bends in the top copper tape and some pieces of grass. There was no water or moisture inside the EHU when it was opened.
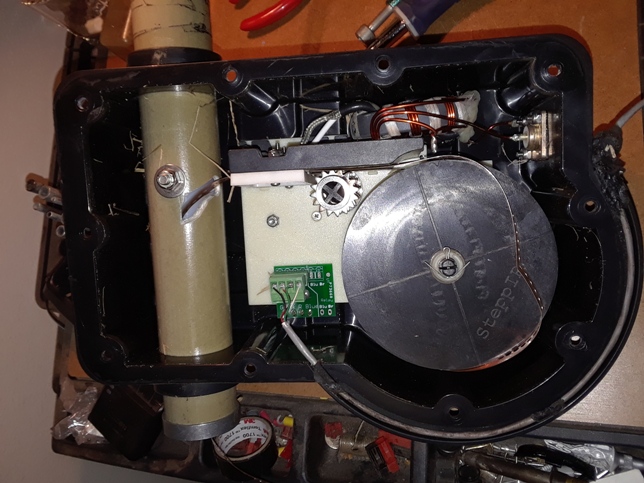
I removed the tape spools and tested the EHU. At that time I noticed corrosion around the top of the motor. The motor tested good as you can see in the video below.
Video 2 – Testing the motor in the DRV EHU
After testing the EHU, the base plate was removed. Other than the hole in the top of the EHU, the housing and balun looked good. I blew out all the grass and other debris with canned air.
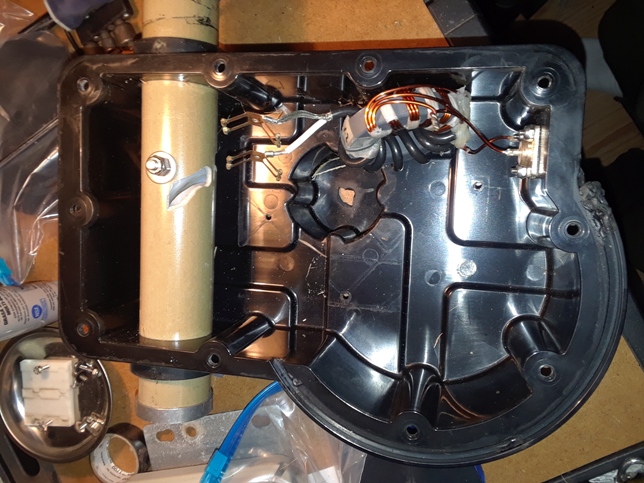
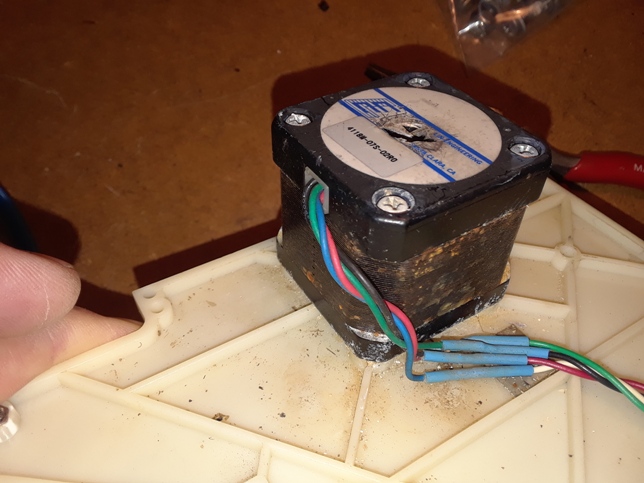
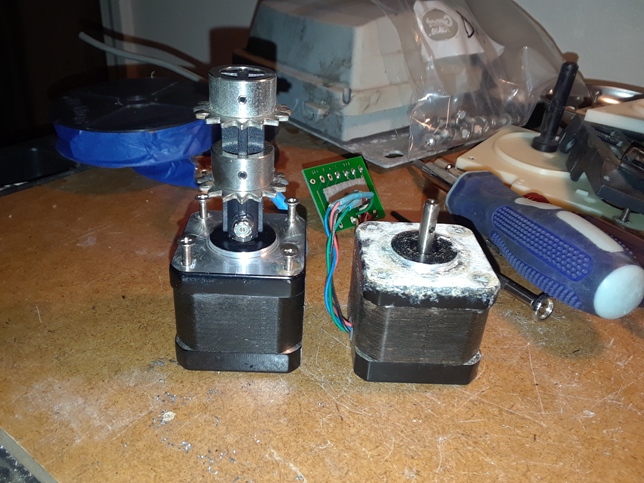
A closer inspection of the motor showed severe corrosion on the outside. I turned the motor shaft by hand and compared it with two other motors and it did not feel smooth. I decided at that point not to reuse this motor.
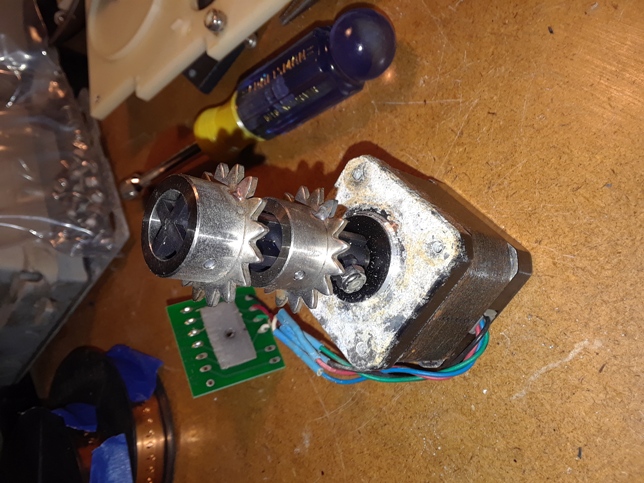
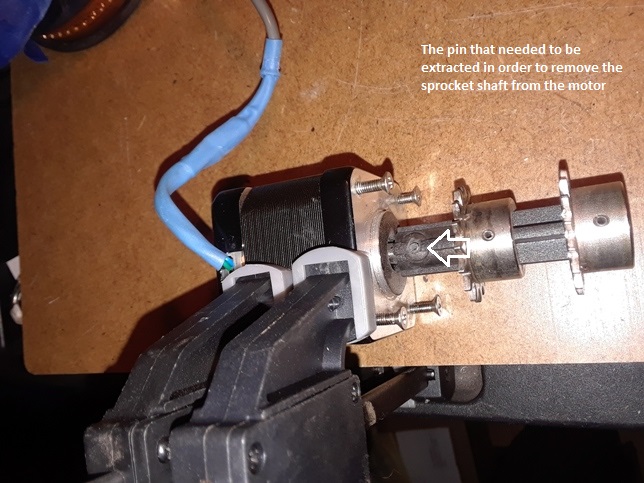
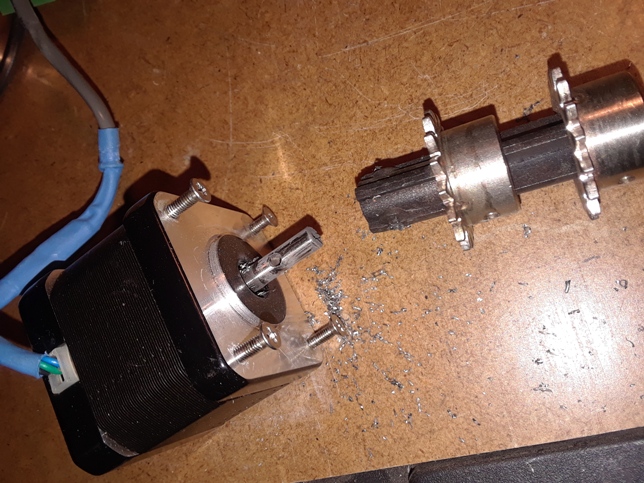
The motor was replaced with a spare from a used EHU purchased from Dave, KE4S. The sprocket connected to the spare motor was held in place by a pin instead of the newer-style method of a screw and nut. This caused the sprocket to be loose and wobble when turned. I decided to put the original sprocket with the screw and nut onto the spare motor. I first had to remove the pin holding the sprocket to the spare motor shaft. I tried tapping the pin out but it wouldn’t come out so it was drilled out.
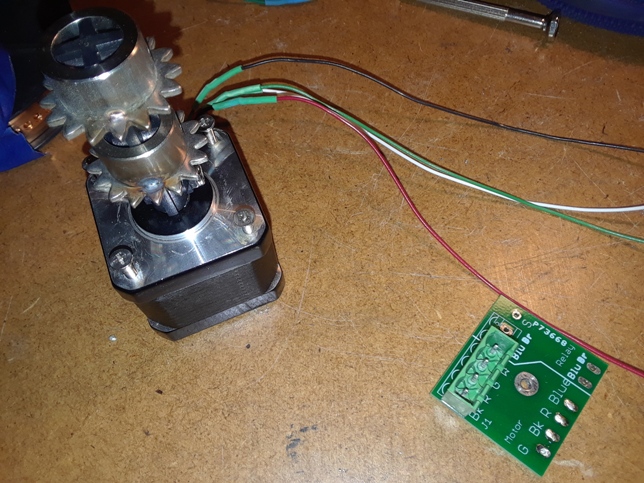
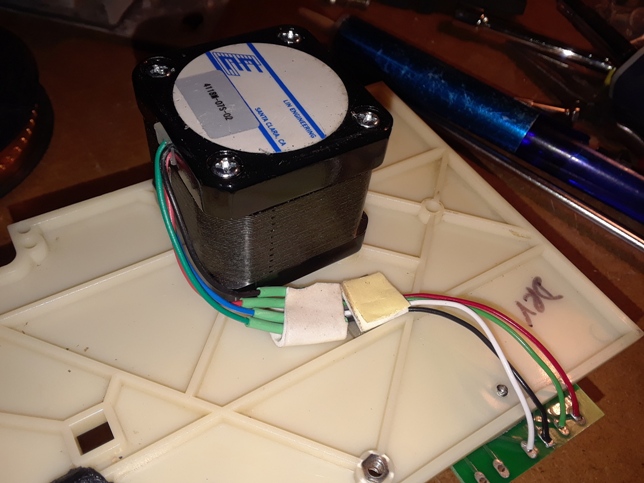
Once the sprocket was installed on the replacement motor, the next step was to install the motor onto the base plate and solder the wires into the connector board.
Sticky tape was used to secure the wires to the base plate.
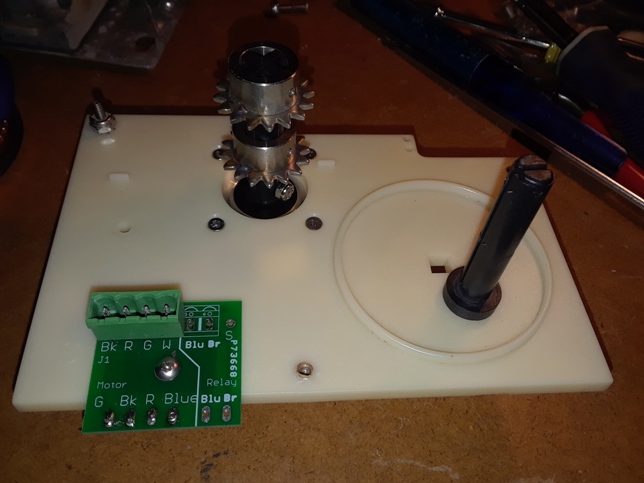
The base plate assembly is now complete.
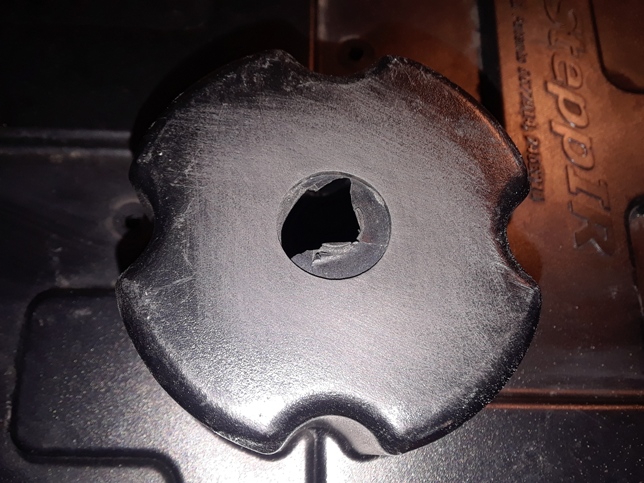
Before re-installing the base plate back into the housing, the hole in the top of the housing needed to be repaired. In order to determine the best way to repair the hole, I tested various methods on a damaged shell I had kept (the shell damaged in Hurricane Isaac in 2012 that prompted me to convert this antenna to 2 elements in the first place).
A penny and JB Weld were used to repair the hole in the top of the EHU. I first sanded the top of the EHU to allow the JB Weld to adhere to the surface.
A penny was then super-glued over the hole and let sit for several hours.
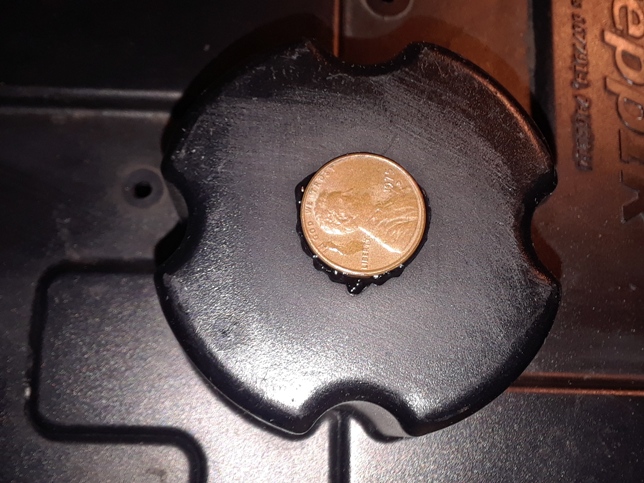
After the super glue set, JB Weld was then used to cover the penny and allowed to set overnight.
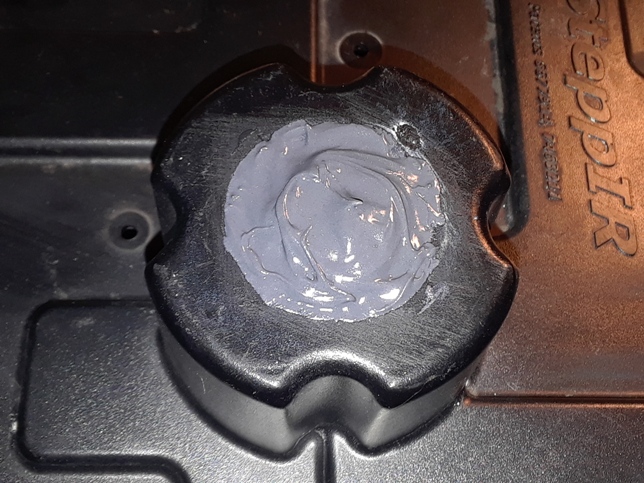
After the JB Weld set for 24 hours, JB Weld was used to seal from the inside too. I didn’t want the surface of the penny exposed and get corroded.
After the JB Weld inside the EHU set for 24 hours, I tested to make sure there was enough clearance for the motor. I put a small dab of Elmer’s glue on top of the JB Weld then set the base plate assembly into housing temporarily. I then removed the plate assembly to see if any glue made it onto the motor. There was no glue on the motor which meant there was good clearance between the JB Weld and motor. The hole in the EHU was now repaired.
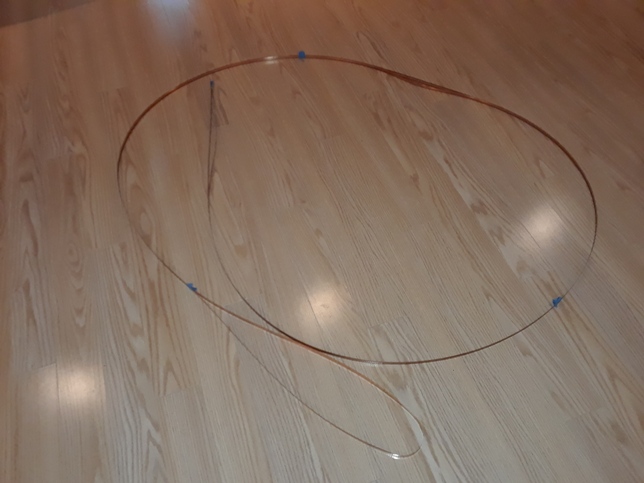
Before continuing with the rebuild of the DVR EHU, I had an important decision to make. The only available set of copper tapes I had for the REF EHU (reflector) were bent up from a broken shaft issue back in November 2015. I have re-used slightly bent tapes before but these tapes were pretty bad. After a closer examination I decided not to re-use these tapes. Pictures of the mangled tapes can be seen in Photo 15 below.

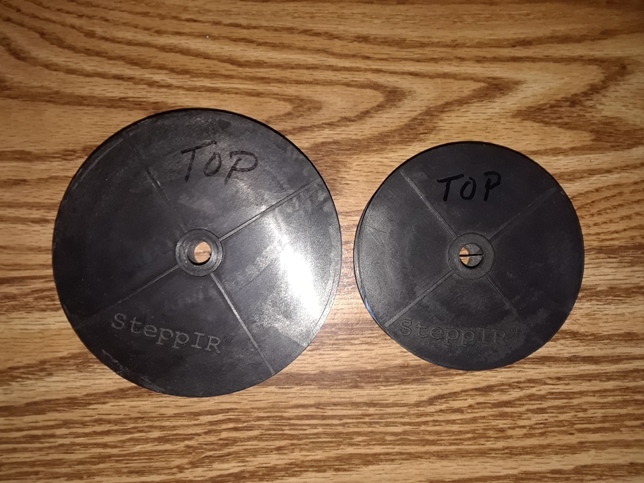
New 20-meter tapes cost $44 each and that was $88 I didn’t want to spend if I didn’t have to. The DVR EHU being rebuilt was a 40-meter EHU which meant it had the larger spools of tapes as compared to 20-meter spools as seen in Photo 15 below.
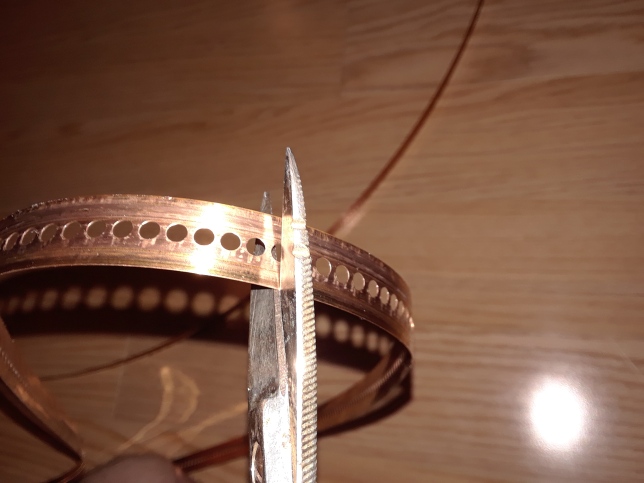
I made an educated guess that the length of tape on a 40-meter spool would be twice as much as the length of tape on a 20-meter spool. To find out the exact amount, I asked Jim Thomas at SteppIR if two 20-meter tapes could be made from one 40-meter tape. His reply was “Yes, with some left over. The lengths are 39′ – 8″ (for the 40-meter tape) and 18′- 9″ (for the 20 meter tape)”. I decided to cut both 40-meter tapes in half and make four 20-meter tapes – two for the REF EHU and two for the DVR EHU.
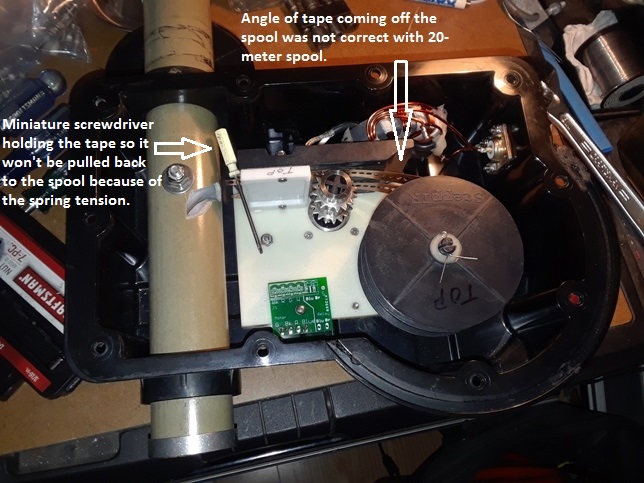
The original thought was to use the spare empty 20-meter spools from the EHU I purchased from Dave, KE4S (more information on the KE4S EHU on the REF EHU Page). I put a length of 20-meter tape on each of the spare 20-meter spools and installed them into the DVR EHU. But it didn’t look right. The angle of the tapes coming off the spool into the sprocket looked off and it was. The reason is because the base plate for the DVR EHU is a 40-meter base plate. I didn’t know there was a difference until I took a closer look.
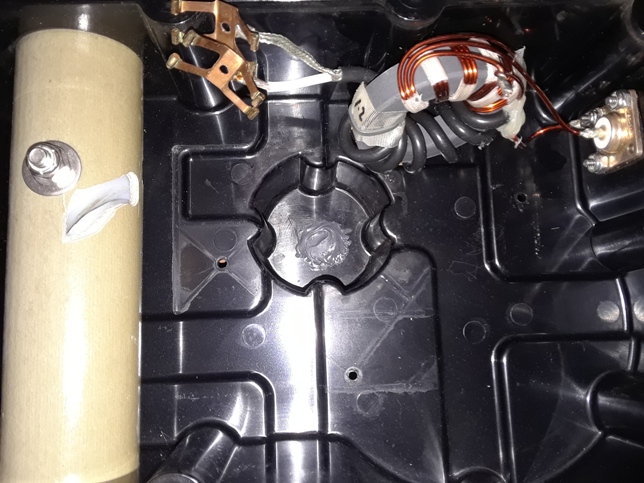
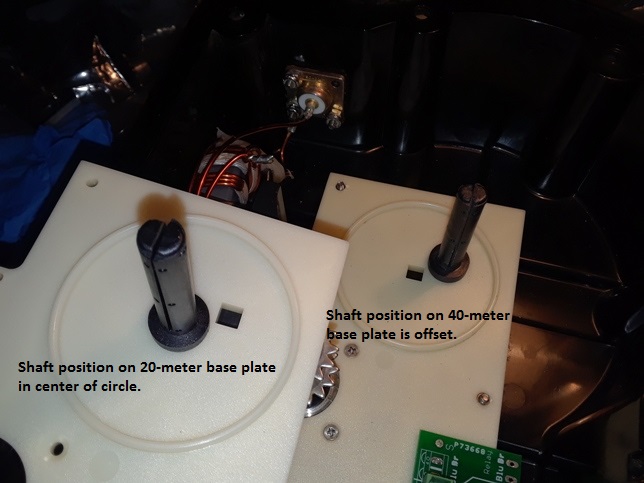
The 20 and 40-meter base plates differ in only two areas as far as I can tell. First is the location of the reel shaft. On the 20-meter plate, the shaft is located in the center of the circle (see Photo 20 below). On the 40-meter plate, the shaft is located off-set from the center. The other difference is the way the plates are mounted inside the EHU. Both mount with the same screw holes in the housing, but the 40-meter plate includes two inserts that the screws screw into rather than using a nut. The reason for this is because a nut would interfere with the 40-meter spool because of its larger size. Thus the two mount screws that go into inserts are shorter than the one that uses a nut. The 20-meter plate mounts with three screws and three nuts.
So now I had another decision to make. Do I put 20 meters worth of copper tape on the 40-meter spools and use the existing 40-meter plate or do I use my last spare 20-meter plate (the one shown on the left in Photo 20) with the 20-meter spools. I ended up using the 40-meter spools and plate and saved my last 20-meter plate assembly in case of a shaft failure. A 20-meter plate can be used in any EHU, including this DRV EHU, if needed.
Installing the 40-meter base assembly into the DRV EHU was more difficult than I thought it would be. When I rebuilt the DRV EHU in my other 3-element yagi, it seemed easier. That time I took the contact brushes off and slid the tapes through the contact plate assembly, then re-installed the brush plate and brushes. I tried doing the same here but it was difficult. So after installing the spools onto the shaft, and rotating them eight turns counter-clockwise and inserting the ends of the tapes into the sprocket, I meticulously used my miniature screwdriver to lift each side of the brush to allow the tape to continue on through the brush assembly. All the while I had to hold the sprocket. Letting go would mean the tape would be pulled back onto the spool because of the tension spring. Turns out this might be the better way to do it. It can be done by one person but it does take time and patience.
Once the tapes were passed through the brush assembly and reinserted into the element support tubes, the bullets were reattached to each end of the copper tapes. I then tested the EHU outside with a set of fiberglass poles attached and the EHU worked great. This EHU was now finished.