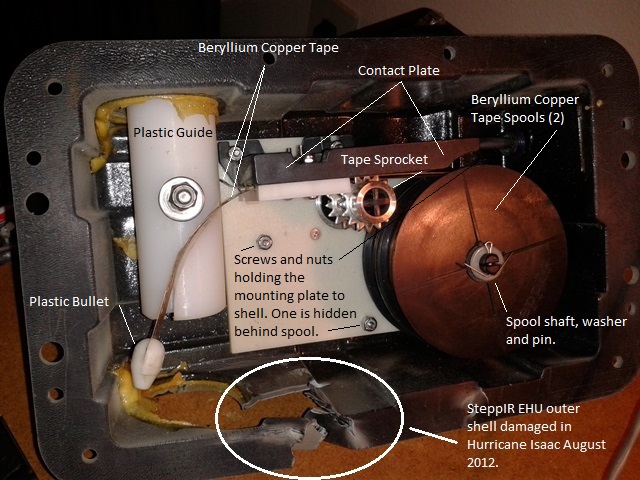
The Reflector EHU (REF EHU) was the second EHU that was rebuilt. It is the one that was damaged in the 2012 hurricane. The element support tubes (ESTs) had been completely ripped off the outer shell, leaving a gaping hole that could not be repaired. The original EHU is shown below.
Wanting to put the antenna back to 3 elements, I had always been on the lookout for an older style housing but could never find one. Newer black housings can be purchased from SteppIR but they are expensive and may require new holes drilled into the mounting plate. My preference was to find older style gray shell.
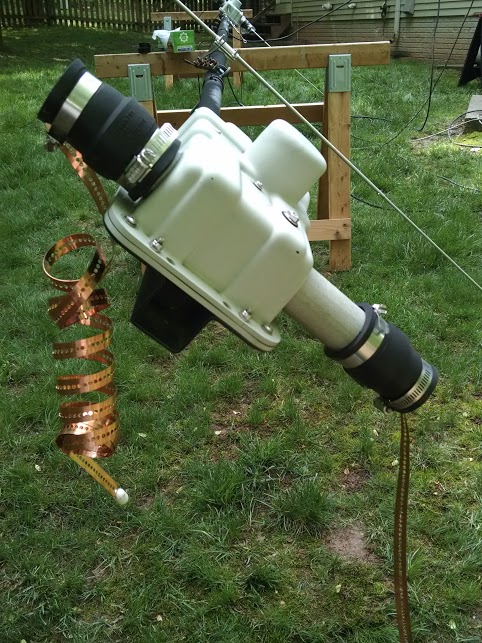
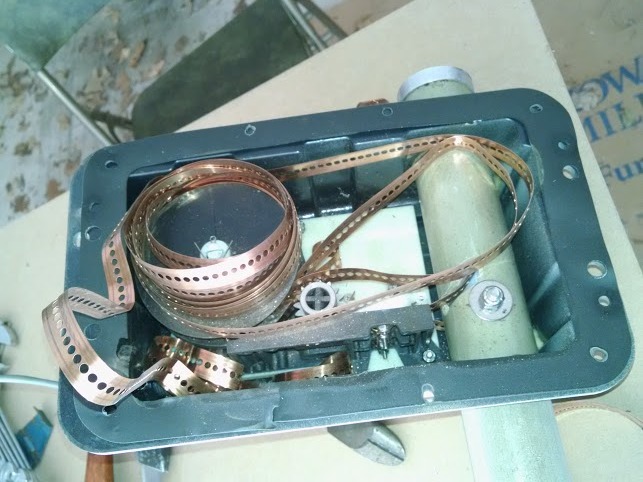
When the DRV EHU failed on my main 3-element yagi in January 2018, I sent the web page URL, showing the repair, to the W4AAW Remote Contesting group. Mike, W4AAW, forwarded it to his friend, Dave, KE4S, who owns a SteppIR antenna. Mike then forwarded Dave’s reply back to me and in the email Dave mentioned he had replaced his older EHUs with new ones. I emailed Dave inquiring the status of his old EHUs. He told me he still had two older style EHUs – the driven EHU, which was good, and a passive EHU which had a broken reel shaft. He agreed to sell me the broken EHU and sent pictures (Photos 2 & 3).
It was exactly what I was looking for – an older style EHU shell in good condition. We agreed on a price and he shipped me the EHU. In it, he included all the parts except the copper tapes which were damaged anyway (he did include the bullets at the ends of the tapes). Little did I know at the time that I would need several other parts from Dave’s EHU, including those bullets. It turned out to be an excellent purchase.
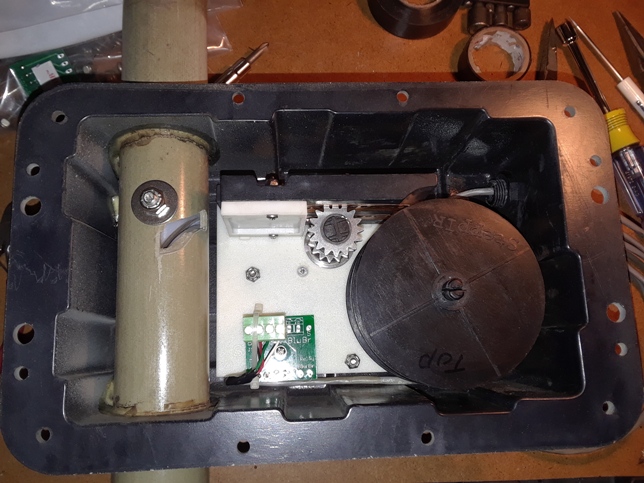
Most of the parts for the REF EHU, including the contacts, contact plate assembly and motor would come from an EHU that had a broken shaft November 2015. I took all the parts off that base plate and re-installed them on a new base plate received from SteppIR.
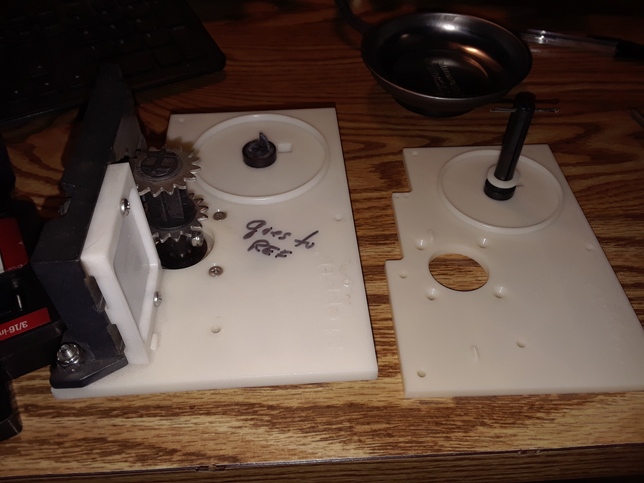
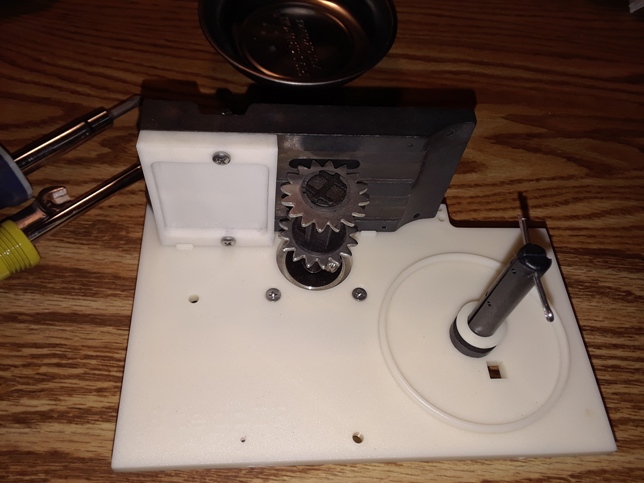
I decided early in the planning stage of the project that I would add the small circuit boards to allow the control cable to be connected to the EHU via a connector instead of hardwired so I purchased two circuit boards from SteppIR for $7 each. The new base plates now come with a small hole already drilled for mounting the circuit board to be screwed into. That hole can be seen (bottom, left) in photo 4 above.
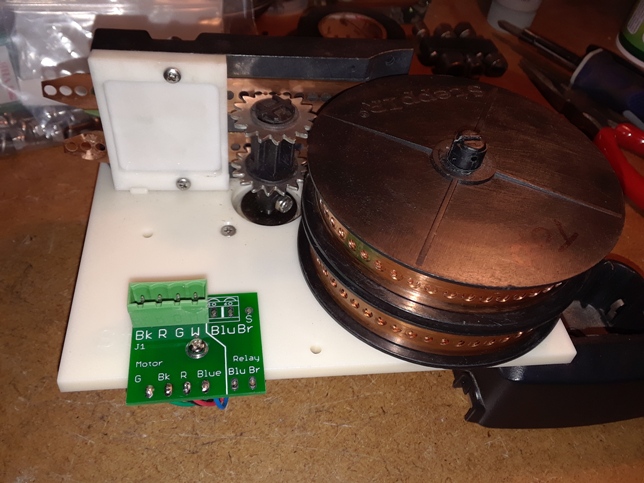
I then added the circuit board and installed the tape spools, turning the spools 8 times counter clockwise to get the correct tension on the spring before placing the copper tapes into the sprockets. To facilitate getting the tapes from the sprockets through the contact assembly, I removed the contacts (not shown), and guided the tapes through by rotating the sprocket with my forefinger and thumb. The contacts were then reinstalled. This is much easier in passive EHU’s (directors and reflectors) because you can do all the work with the base plate assembly not installed in the housing. You can’t do that with driven EHU’s which has the coax connected to the brushes.
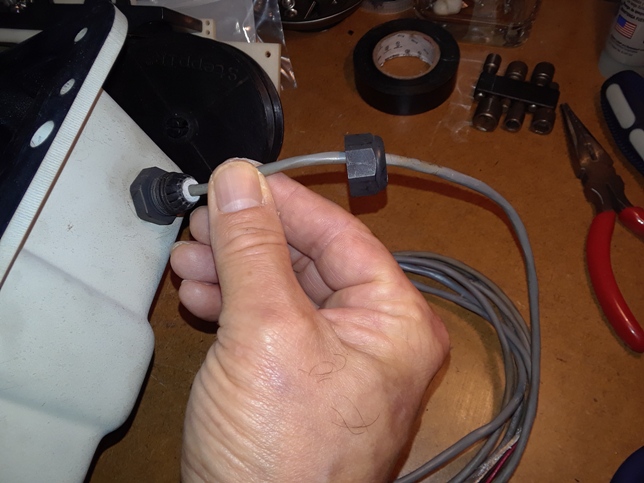
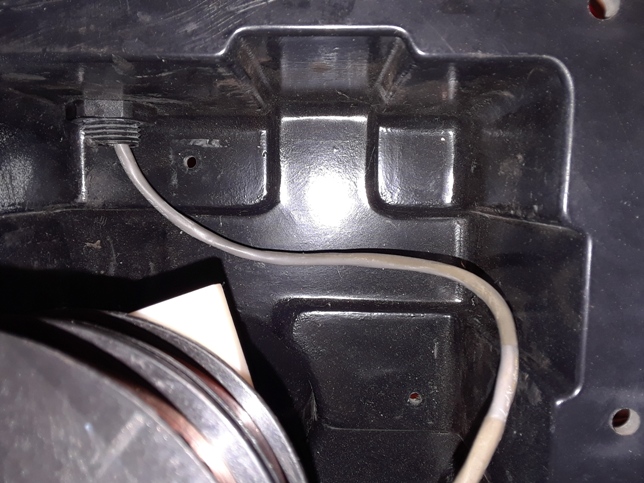
Next the control cable was inserted into the EHU. The older style EHUs use a plastic CGB fitting. The fitting was in good condition on the KE4S replacement shell.
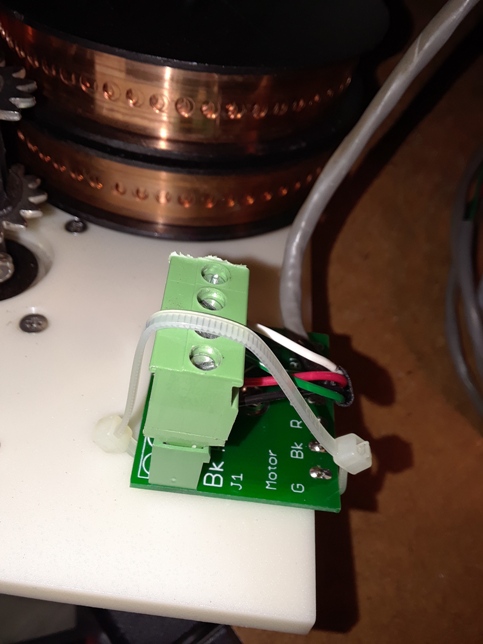
The control cable was then terminated into a connector (actually had two spare in my parts stash). The connector was installed into the circuit board and held with a tiewrap. Why the tiewrap? The connector sits upside down when the EHU is installed on the antenna and not as shown here. I’ve actually had connectors become dislodged in both the director and reflector EHUs in my main 3-element yagi after being shook hard in a violent storm. That story here. So now I always secure the connectors. The cable ties are only to hold the connector in place and are not tightened much.
The routing of the control cable inside the shell is critical. It must be routed so that it doesn’t get smashed when the base plate assembly is re-installed. Luckily the the shell is made so the cable can be routed without being bothered by the base plate or interfering with the operation of the EHU.
When I first tried re-installing the base plate, I found the edge of connector board was sticking out too far from the base plate. It was butted up against the side of the housing and not allowing the holes to line up for the mounting screws. So I had to drill a new hole for the connector board and relocate it back farther onto the plate to allow clearance from the side of the housing. Once the circuit board was relocated, the base plate assembly installed with no issue.
Installing the ends of the copper tapes into the EST is always a bit of a challenge. But with some patience, it can be done with one person. The important thing here is to turn the sprocket to advance the tape and not the spools. Also, do not pull on the tape. That doesn’t work well.
Once the tapes were maneuvered through the EST, bullets were re-installed on the ends of the tapes. I used the older style bullets I got from the KE4S EHU because I couldn’t find the original bullets removed back in 2012. There is a slight difference but I couldn’t find anyone on the SteppIR reflector who could tell me why they changed the design and if there were any problems with the older bullets. One reader said he has been using older bullets with no problems so I decided to just leave the older bullets installed. I later found the 2012 bullets on the day I sealed the EHU. I’ll keep them as spares.
The EHU was tested and it tested good. The REF EHU was ready to go.